
Acrylic CNC Router Projects: Beginner Ideas, Files, Materials, and Build Tips
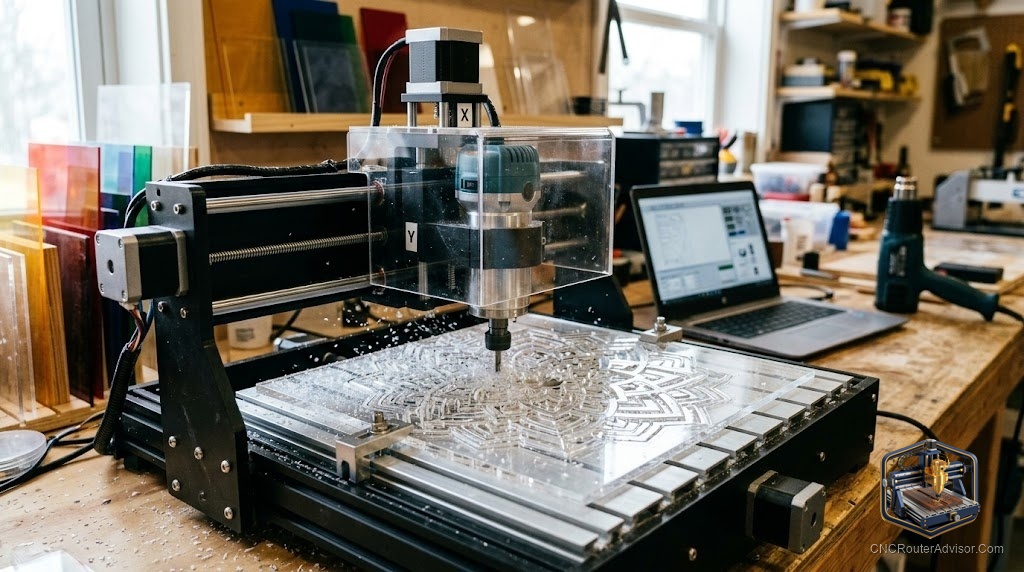
You finish the wood sign, hang it on the wall, and then someone asks: can you do that in acrylic? The lit-up kind, with LEDs inside? That question is the gateway to acrylic CNC routing, and it is a different enough material from wood that the first few attempts tend to end with melted edges, chipped corners, and a ruined bit if you do not change your approach.
Acrylic is a thermoplastic. It melts before it burns. That single fact changes everything about how you cut it on a CNC router: the wrong RPM or feed rate does not just dull a bit, it fuses chips back into the cut, creating a rough, cloudy edge instead of a clean transparent one. Get the settings right and acrylic cuts better than most wood, leaving edges clear enough to light up with an LED strip.
Here is the short answer for acrylic on a CNC router: use a single-flute end mill, run the spindle between 10,000 and 18,000 RPM depending on the cut depth, keep chip load high enough to move each chip before it re-melts, and use a ramp entry instead of a straight plunge. Those four rules produce clean cuts in acrylic. Ignore any of them and the edge tells you immediately.
Why acrylic is different from wood on a CNC
Wood is hygroscopic, grainy, and brittle-ish. Its failure modes are fuzz and tearout. Acrylic is uniform, isotropic, and thermoplastic. Its failure modes are melting and chipping.
Melting. Acrylic softens at around 85 to 105 degrees Celsius depending on the grade. A dull bit or a chip that sits in the cut and gets re-cut generates heat. The melted chip re-welds to the cut wall, leaving a hazy, uneven surface. This is the most common acrylic failure mode.
Chipping. Acrylic chips at the cut edge if the feed rate is too low or the bit geometry is wrong. Each cut should produce a clean chip that leaves the cut immediately. If the chip stays and the tool cuts it again, the energy goes into fracturing the edge rather than removing material.
The fix. Single-flute bits maximize chip space, which gets each chip out of the cut before the tool returns. High chip load (faster feed for the same RPM) ensures each tooth takes a real cut rather than rubbing.
The right bit for acrylic
Use a single-flute (O-flute) upcut spiral end mill. The large gullet evacuates chips fast. The upcut helix pulls chips out of the cut. No chip re-welding, clean walls.
Two-flute bits work in acrylic at lower feed rates if you have no single-flute option, but require more care to avoid melting in deep pockets.
Ball-nose bits work for 3D engraved designs in acrylic but require even more attention to chip load and heat in deep relief work.
V-groove bits cut cleanly in acrylic for engraving and text. The wedge geometry efficiently removes material without the packing problem of spiral bits in shallow grooves.
Verified picks:
- AUNMAS 6mm Single-Flute Downcut Spiral, for acrylic and PVC: single-flute geometry maximizes chip space and the downcut helix keeps the top edge clean
- Genmitsu VG05A 5-piece V-groove set: for engraved text and detail work in acrylic and wood
Feeds and speeds for acrylic
Starting parameters for cast acrylic (cleaner cutting) on a hobby machine:
- Spindle RPM: 12,000 to 18,000 (lower than wood to reduce heat)
- Feed rate: 1,500 to 3,000mm/min (higher than you might expect to keep chip load up)
- Pass depth: 1 to 2mm per pass for a 6mm single-flute bit
- Plunge: ramped entry at 2 to 3 degrees, not straight plunge
The formula for chip load: Feed Rate = RPM x Flutes x Chip Load
For a 1-flute bit at 15,000 RPM with a target chip load of 0.05mm: 15,000 x 1 x 0.05 = 750mm/min minimum. In practice, push to 1,500 to 2,000mm/min and dial back if you see melting.
Extruded acrylic is harder to cut cleanly than cast acrylic and melts more readily. If you have a choice, buy cast acrylic (often marked “G” grade or sold as Plexiglas cast sheet).
Workholding for acrylic
Acrylic is smooth and slippery. Mechanical clamps work, but double-sided tape tends to fail because the acrylic flexes slightly under cutting load and the tape shears. For small pieces, the tape-and-CA-glue method (painter’s tape on both surfaces, CA glue between) works well.
For production sheet cutting, vacuum hold-down is the most reliable method. The entire sheet is held flat by suction rather than edge clamps, which also means no clamp shadows in your toolpath.
One extra step specific to acrylic: leave the protective film on the sheet during cutting. It reduces scratching from chips sliding across the surface and provides a slight cushion against clamp marks. Remove the film after cutting.
Beginner acrylic CNC projects
These are practical starting points for acrylic CNC work:
Edge-lit signs. Cut a simple design with V-bit engraving into the face of a clear acrylic sheet. Mount LED strips along the bottom edge. The engraved lines scatter light and glow. The rest of the panel stays clear. This is the most-asked-for acrylic CNC project and one of the simplest to execute.
Name plates and desk signs. Cut a rectangle of acrylic with rounded corners and engrave text or a logo into the surface. Mount on a small stand cut from scrap MDF. Simple, clean, gift-worthy.
Phone and tablet stands. Acrylic bends cleanly with a heat strip bender after cutting. Cut the profile on the CNC, bend to shape, and sand the edges clear. The bent result looks manufactured, not handmade.
Display boxes and frames. Cut panels and slot them together using finger joints or tab-and-slot joinery. Thin acrylic (3mm to 6mm) cuts precisely on even a hobby machine, and the joints are tight enough to assemble without adhesive.
LED channel letters. Cut letter profiles from acrylic sheet, add LED strip to the interior face, and mount on a backer. The letters glow from within. Used in signage and props.
Trophy bases and awards. Thick clear acrylic (10mm to 15mm) cut and engraved with relief text or a logo looks like a machined crystal award.
Snap-together enclosures. Tabs and slots work precisely in acrylic, letting you design boxes that snap together without glue. Useful for electronics project housings.
Finishing acrylic edges after cutting
Freshly CNC-cut acrylic edges are clear but have tooling marks: small parallel ridges from the bit passes. To achieve a polished, lens-clear edge:
- Sand progressively: 220 grit, then 320, then 400, then 600, then 800.
- Finish with acrylic polish (Novus Plastic Polish #2 is the standard recommendation) or flame polishing.
- Flame polishing uses a small propane torch passed quickly across the edge. Done correctly it melts and smooths the sanding marks into a optically clear finish in seconds.
For projects where the edge is not visible (like internal slot joinery), skip the polishing entirely.
Acrylic types and what cuts best
| Type | Cut quality | Notes |
|---|---|---|
| Cast acrylic | Excellent | Cleaner cuts, less melting tendency |
| Extruded acrylic | Good | More prone to melting, requires lower RPM |
| Colored acrylic | Same as clear | Coloring does not change cutting properties |
| Mirrored acrylic | Good | Mirror coating on back; do not scratch it |
| Fluorescent edge-lit acrylic | Excellent | Specifically designed to transmit light along edges |
For LED edge-lit signs, fluorescent or clear cast acrylic is the best choice. The fluorescent grades (neon green, neon orange, neon blue) glow dramatically under LED because the polymer is formulated to catch and redirect light along the panel edge.
Verified machines for acrylic CNC routing
| Machine | Work area | Spindle | Best for |
|---|---|---|---|
| Genmitsu 3018-PROVer V2 | 300x180mm | 775 motor | Small plaques, PCB, thin acrylic sheet |
| Axiscreat A6060 | 600x600mm | 710W trim router | Signs, display boxes, edge-lit panels |
| OCASAMI 2.2KW 6090 | 900x600mm | 2.2kW water cooled | Production acrylic cutting, thick sheet |
Verdict
Acrylic rewards the CNC router owner who learns the material’s one important rule: get the chip out of the cut before it melts back in. A single-flute bit, a ramp entry, and a feed rate that keeps chip load above rubbing threshold is the whole formula. Start with a 6mm single-flute bit on 3mm cast acrylic, run at 15,000 RPM and 1,500mm/min, and adjust from there.
Four takeaways:
- Single-flute (O-flute) bits for acrylic. Two-flute works but requires more care.
- Cast acrylic cuts cleaner than extruded. If you have a choice, buy cast.
- Leave the protective film on the sheet while cutting.
- Ramp entry, not straight plunge. Straight plunging concentrates heat and chips at the bottom of the hole.
FAQ
What bit should I use for cutting acrylic on a CNC router? A single-flute (O-flute) upcut spiral end mill. The large gullet evacuates chips before they can re-melt back into the cut.
Why does my acrylic come out cloudy or melted? The cut is running too hot. Usually caused by too-low feed rate (not enough chip load, so the bit rubs instead of cuts), too-high RPM, or a dull bit. Increase feed rate first, then reduce RPM if melting continues.
Can I cut acrylic on a small hobby CNC router? Yes. Even a 3018-class machine cuts thin acrylic with the right bit and settings. Match the pass depth to the machine’s stiffness.
What is the best acrylic for CNC routing? Cast acrylic, sold as Plexiglas G or generic cast sheet. It cuts cleaner and melts less readily than extruded acrylic.
How do I get clear edges on CNC-cut acrylic? Sand progressively from 220 to 800 grit, then finish with acrylic polish or flame polishing with a propane torch.
What thickness of acrylic can a hobby CNC router cut? Depends on Z clearance and spindle power. A desktop machine with a 710W spindle cuts 6mm acrylic comfortably in two to three passes. 10mm acrylic requires a stiffer machine and more passes.
References
- cncrouterinfo.com, “How to Choose a CNC Router”: https://cncrouterinfo.com/guides/how-to-choose-a-cnc-router/
- BubbleRelief, “CNC Router Projects for Beginners”: https://bubblerelief.com/cnc-router-projects-for-beginners/
- Inventables, “Cutting Acrylic on the X-Carve”: https://www.inventables.com/blog/cutting-acrylic