
Planning a CNC Wood Router Project: From Idea to Finished Piece
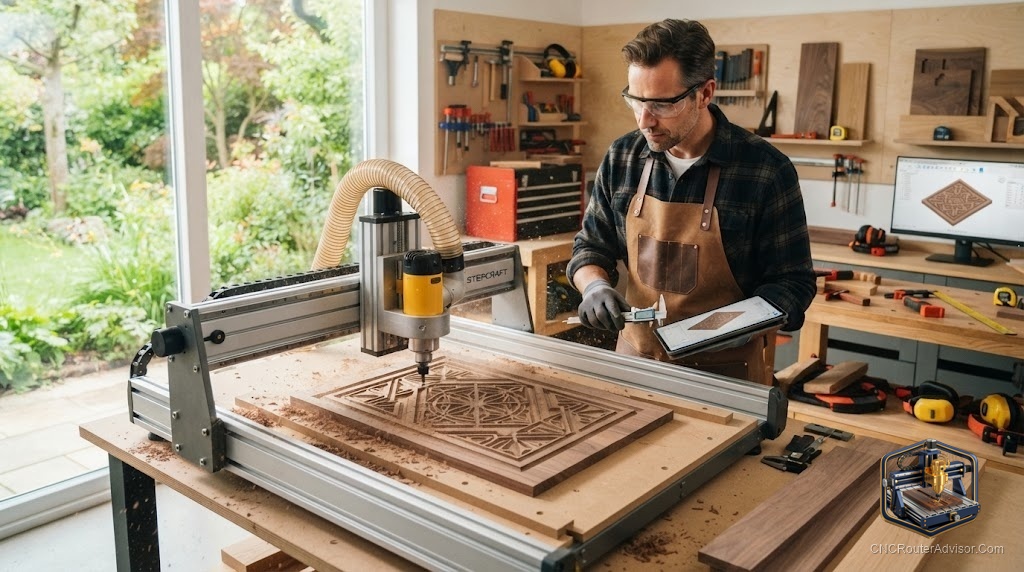
The router will cut whatever you tell it to cut. That is both the promise and the trap. Most failed CNC wood projects do not fail at the machine; they fail at the planning stage, when someone skips the conversation between the design, the wood, and the process, and sends a file that would work on an ideal slab of generic homogeneous material. Real wood is not that material.
A CNC wood router project done well is a process, not just a button press. It starts with a design matched to the machine’s actual capability, continues through wood selection that fits the geometry, and finishes with a toolpath strategy that treats the grain and figure of the material as a variable in the plan, not an afterthought. Do those three things and the machine becomes a genuine creative tool. Skip them and you spend a lot of time explaining to yourself why the part looks like it almost worked.
A CNC wood router project is a completed wooden object or component produced fully or partly with a computer-controlled router. The range covers decorative signs and carvings, furniture parts, boxes and organizers, inlays, architectural millwork, and 3D relief pieces. What makes a project specifically a CNC project rather than a hand-routed or sawn project is the precision, repeatability, and complexity the machine enables that hand methods cannot match.
The best CNC wood projects play to those strengths: accurate repeated geometry, clean pockets to a consistent depth, complex outlines cut identically across a batch, and 3D reliefs that would be nearly impossible to carve by hand. If a project does not use any of those capabilities, it may be faster and simpler with traditional tools.
Choosing a project that matches the machine
A CNC router is not equally good at everything. It excels at flat work with complex outlines, consistent pocketing, repetition, and 3D relief carving within its Z-axis clearance. It is slower than a bandsaw for curved rip cuts and less precise than a router table for long edge profiles.
When planning a project, ask what the machine brings to it that justifies the setup time. For a carved sign, the answer is clear: clean V-carved lettering at a consistent depth, cut the same way on every piece in a run. For a set of drawer boxes, the answer is accurate dado pockets and corner-notched profiles that fit the same way every time. For a 3D relief panel, the answer is a carving that would take days by hand and takes hours on the machine.
Projects that strain the machine’s capability, such as through-cuts on thick hardwood at full depth in one pass, or reliefs that require more Z clearance than the machine has, frustrate rather than showcase. Match the design to what the machine can actually do, and the outcome looks like it was easy.
Wood selection for CNC routing
Not all wood behaves the same way on a router, and the design choices that work beautifully in soft maple become problems in figured walnut.
Grain direction matters. V-carving across the grain produces a different edge quality than V-carving with it. In open-grained species like oak, carved pockets can look rough where the bit exits the grain. In closed-grain species like cherry and maple, carved edges come out crisper. Understanding this lets you orient text and art on the blank to take advantage of the grain rather than fight it.
Hardness affects tooling and feeds. MDF is the forgiving practice material: it cuts cleanly, holds detail, paints well, and costs almost nothing. For a painted sign or a template, it is often the right choice. For furniture parts, figured carving, or anything that will be stained and finished to show the wood, choose the species for the look you want and adjust feeds accordingly. Basswood and butternut are soft and carve crisply, good for 3D relief. Walnut is harder but holds fine detail beautifully. Dense exotics require slower passes and sharper tooling.
Flatness is not negotiable. A board that cups or rocks on the spoilboard will vary in Z depth across its surface. Surface the spoilboard, flatten the blank before putting it on the machine, and use enough clamps or vacuum hold-down to keep it flat. A planer and a sled make this straightforward. Skipping it makes every Z-depth-sensitive operation a gamble.
Toolpath strategy: the decisions that matter
For carving and pocketing:
- Rough the pocket or carving with a larger bit first, then finish with a smaller tool for clean edges and detail. The large bit moves fast; the small bit follows where the large one set up the geometry.
- Leave a small finishing allowance on walls and floors when roughing: 0.5 to 1 mm is typical. The finish pass removes just that allowance, and the edge quality is cleaner than roughing to the line.
- Ramp entry on pocketing passes instead of plunging vertically. Plunge entry puts all the load on the tip of the bit. Ramp or helical entry spreads that load across the flutes.
For profiling and cutouts:
- Tabs hold parts in place until the profile cut completes. They are small bridges of uncut material between the part and the surrounding sheet. Too few and small parts lift before the cut finishes. Too many and they leave marks to sand out. Three or four small tabs for a part the size of your hand is a reasonable default.
- Climb cuts produce a cleaner edge on profiling passes but can pull the bit into the material if the cut is too aggressive. A conventional finish pass after a climb roughing pass gives clean results with less risk.
For 3D relief:
- The roughing pass (usually with a large ball nose or bull nose bit) removes bulk material quickly at low Z resolution. The finish pass with a small ball nose runs at high stepover resolution. Let the machine run both and do not try to skip the rough pass.
- Orientation of the toolpath (X-direction, Y-direction, or 45 degrees) shows differently in the finished surface depending on lighting. Running the finish pass at 45 degrees to the grain is a common choice because it blends better in raking light.
Finishing a CNC-routed wood project
The machine leaves marks the finish reveals. The saw-tooth pattern from ballnose passes, the fuzz at the edge of a V-carved groove, the fuzzy grain on an oak pocket: all of these disappear or stand out depending on the finish approach.
For painted work: fill, sand to 180, prime, sand to 220, paint. The fill step is important if there are fuzz or tool marks; it is less important on smooth-grained species.
For clear-finished work: sand to 220, raise the grain with water, re-sand to 220, then apply finish. The grain-raising step prevents the first coat from doing it for you. A card scraper does a better job than sandpaper in V-carved grooves where sandpaper cannot reach.
The verdict
A CNC wood router project succeeds when the design plays to the machine’s strengths, the wood is chosen for its behavior as much as its appearance, and the toolpath strategy respects the sequence of rough, finish, and tabs. Get those three right and the machine produces work that looks like it cost far more time than it did.
Three things to take with you:
- Choose projects that use what a CNC does well: precise repeated geometry, clean pockets, complex outlines, 3D relief.
- Flatten blanks before routing and surface the spoilboard; Z-depth consistency depends on it.
- Rough and finish in sequence with different bits: the rough pass moves fast, the finish pass cuts clean.
FAQ
What are good CNC wood router projects for an intermediate maker? Inlaid cutting boards, 3D relief wall art, segmented bowls (cut on a router, assembled from segments), furniture parts with integrated joinery, and decorative boxes with fitted lids are all projects that use CNC capability well without requiring industrial-scale equipment.
What wood is best for CNC routing? For carvings and 3D relief: basswood, butternut, and soft maple carve cleanly and show detail well. For furniture and structural parts: hard maple, walnut, and cherry hold tolerances well and finish beautifully. For painted work: MDF is the practical workhorse.
How do I keep small parts from flying when routing a profile cut? Use tabs: small bridges of uncut material that hold the part to the surrounding sheet until the cut is done. Program three or four tabs for a hand-sized part, then cut them off and sand the marks.
Why does my V-carved text look fuzzy? Open-grain species like oak and ash produce fuzz at the edge of V-carved grooves where the bit exits the grain. Use a sharp V-bit, take a finishing pass at reduced depth, and apply a grain sealer before painting to bind the fuzz before painting covers it.
Do I need to flatten my wood before CNC routing? Yes, if depth consistency matters. A warped or cupped blank produces varying depths across the surface, which shows most clearly in V-carving and pocketing. Run the blank through a planer or router sled and hold it flat on the machine.
What is the roughing and finishing pass approach? Roughing uses a larger bit at aggressive settings to remove most of the material quickly. Finishing uses a smaller bit at finer stepover settings to remove the remaining material and produce the final surface quality. The sequence is faster overall than trying to do everything in one pass.
References
- Vectric, “Toolpath strategies for 3D carving” (Vectric tutorials): https://www.vectric.com/support/tutorials
- Wood Magazine, “A Buyer’s Guide to Benchtop CNC Machines”: https://www.woodmagazine.com/tool-reviews/a-buyers-guide-to-benchtop-cnc-machines