
Build a CNC Wood Router: An Honest Roadmap From Frame to First Cut
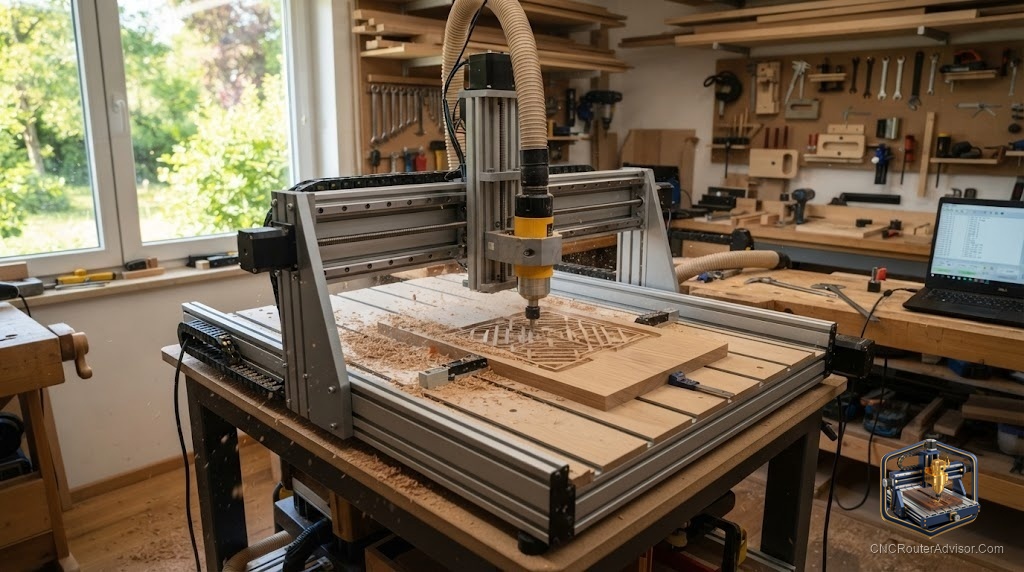
There is a certain type of woodworker who cannot buy a machine without wondering whether they could build it better, or at least cheaper. If that is you, building a CNC wood router is one of the most rewarding projects in the shop, and one of the most humbling. Done with clear eyes, you end up with a machine you understand down to the last bolt. Done on optimism alone, you end up with a pile of extrusion and a new appreciation for factory assembly.
Building a CNC wood router means assembling your own computer-controlled cutting machine from a frame, a motion system, electronics, and a cutting spindle, either from a kit or from individually sourced parts. It is a project pursued for the cost savings, the learning, and the ability to size and customize the machine to your own shop.
The direct answer before the detail: build a CNC wood router if you value understanding your machine and are willing to trade time for money and knowledge. If you want to be cutting parts this weekend with zero mechanical fuss, buy an assembled machine instead. This roadmap walks the real path from frame to first successful cut, and where the tooling that actually earns its keep comes in.
Start with the frame, because everything rides on it
Rigidity is decided at the frame, and no clever wiring fixes a wobbly one. Common approaches include aluminum extrusion designs, laser-cut wood kits, and heavier steel builds for larger machines. For a wood router, a stiff aluminum-extrusion or steel frame gives clean cuts and room to grow, while a wood-frame kit is the friendliest and cheapest entry for soft materials.
Decide your work area before you buy anything. A bigger frame means longer spans, which means more flex to engineer against. Most first-time builders are happier with a modest, stiff machine than an ambitious, floppy one. Build small and solid, then scale up once you know what you are doing.
Choose a motion system honestly
Motion hardware sets precision and how hard you can push. Belts are cheap, smooth, and fine for wood and signs, but give a little under heavy load. Lead screws and ball screws add rigidity and repeatability, with ball screws the smoothest and priciest. Linear rails beat V-wheels for stiffness and longevity but cost more. Match the motion to your materials: belts for light wood work, screws and rails if you want to push hardwood or add metal later.
Electronics and control: keep it standard
For a wood router, a GRBL-based controller on an Arduino-class board is the well-trodden path. It is open source, deeply documented, and supported by free sender software and a huge community, so when something goes wrong, someone has solved it before. Steppers in the NEMA 17 to NEMA 23 range cover most builds, sized to the machine. Standard beats exotic here, because support is worth more than a slightly better spec you cannot get help with.
The spindle and the tooling that finishes the job
Most DIY wood routers start with a compact trim router as the spindle: affordable, available, and strong enough for wood. A VFD spindle is a later upgrade for quieter, more powerful running. Whatever the spindle, the machine is only as good as the bits you feed it.
A few verified tooling and workholding pieces punch above their price on a home-built machine. For smooth 3D carving, the SpeTool 5-piece ball nose router bits with a 1/8 inch shank suit smaller desktop-scale builds, while the SpeTool ball nose end mills with a 1/4 inch shank and longer cutting length fit larger machines and deeper reliefs. For holding work down without endless clamping fuss, the Genmitsu 4-pack hold-down clamp kit works with T-slot spoilboards and holds material up to about 35 mm thick. The honest caveat on all three: match the shank to your collet and the clamp size to your spoilboard, because tooling that does not fit your build is just a drawer decoration.
Expect a real build, then a real payoff
Budget more time than you think, especially for squaring the frame, setting belt tension or screw backlash, wiring, and tramming the spindle so it is perpendicular to the bed. The first successful cut on a machine you built yourself is a genuinely good feeling, and the understanding you gain makes you far better at maintaining and pushing it.
If partway through you decide building is not for you, there is no shame in it. See our best CNC router for a small shop guide for verified assembled options.
Final verdict
Building a CNC wood router is a trade: your time and patience for cost savings, customization, and deep understanding. Start with the stiffest frame you can afford at a modest size, choose a motion system that matches your materials, keep the electronics standard and GRBL-based, and invest in tooling that fits your machine. Do that and you finish with a router you can fix, tune, and trust. Rush the frame or chase size over stiffness, and you learn the hard way why rigidity is the first thing every experienced builder mentions.
FAQ
Is it cheaper to build a CNC wood router than to buy one? Often yes on parts, but the gap narrows once you add the spindle, dust collection, and tooling. The bigger returns are customization and the knowledge you gain, which make you better at running and maintaining the machine.
What is the best frame material for a DIY CNC wood router? Stiff aluminum extrusion or steel gives the cleanest cuts and room to grow. Laser-cut wood kits are the cheapest, friendliest entry for soft materials but are less rigid.
What controller should I use? A GRBL-based controller on an Arduino-class board is the standard, well-documented path for wood routers, with free sender software and strong community support.
Do I need ball screws, or are belts fine? Belts are fine for wood and signs. Lead or ball screws and linear rails add rigidity and repeatability for hardwood or if you plan to cut metal later. Match the motion system to your materials.
How long does it take to build one? Plan for at least a full weekend, more for larger machines. Squaring the frame, wiring, configuring the controller, and tramming the spindle all take time to do well.
What tooling do I need to start? At minimum a few good bits matched to your collet, such as ball nose bits for 3D work, plus reliable workholding like a hold-down clamp kit for a T-slot spoilboard.
References
- GRBL project documentation (open-source CNC controller reference): https://github.com/gnea/grbl/wiki
- SpeTool, ball nose router bit specifications: Check on Amazon
- Genmitsu, hold-down clamp kit specifications: Check on Amazon