
CNC Router Projects: Beginner Ideas, Files, Materials, and Build Tips
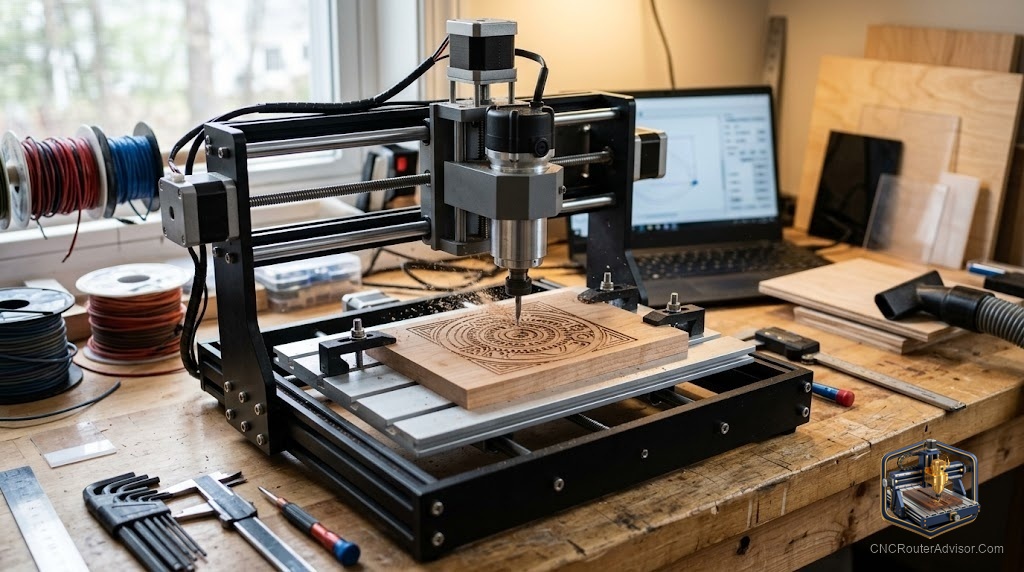
The first time you watch a CNC router carve a personalized name sign from a raw pine blank, you understand why people get obsessed. The machine traces every serif, every fine stroke, without your hands ever touching the wood. The result looks like it took a skilled carver an afternoon. It took the machine eleven minutes.
CNC router projects are woodworking and craft items made using a computer-controlled router — a machine that moves a spinning bit in precise paths across wood, plastic, or other materials to cut, engrave, and carve designs you’ve drawn or downloaded. A CNC router doesn’t require woodworking skill to operate, but it rewards people who understand materials, bits, and design. The machine handles repetition and precision; you handle creativity and setup.
If you have never used a CNC router before, start with a V-carved name sign in pine or poplar: it teaches the full workflow (design, toolpath, workholding, cut, finish) in under an hour, and the result is something you’d actually want to hang on a wall. From that foundation, almost every other beginner project is a variation on the same skills.
Why Start With Signs
Signs are not just the beginner default because they’re easy. They’re the default because they teach you everything in one project.
A personalized name sign requires you to: import or draw text in your CAD software, set up a V-carve toolpath, secure the blank to the spoilboard, zero your Z axis, and apply a finish to the carved area. That workflow is identical for an address plaque, a quote board, a pet memorial, or a business logo sign. Master signs and you have the foundation for most profitable CNC work.
Family name sign: A simple oval or rectangle with a last name in a bold serif font, V-carved into 3/4-inch poplar or pine with a 60-degree V-bit. Sand to 220 grit, paint the field, let it cure, then lightly scrape the surface paint off the raised flats to reveal the wood. The result looks like a painted carved sign worth several times the cost of materials.
House number plaque: Bold sans-serif numbers on a 12-by-6-inch hardwood blank, sealed with exterior polyurethane for weather resistance. Address plaques in cedar or white oak last years outdoors. These sell consistently because every house needs one and the customization makes a generic box store version feel cheap by comparison.
Quote sign: A decorative quote in two font styles (a script accent and a bold block secondary), laid out with visual hierarchy in VCarve or Carbide Create. The main text in a clean bold font, a secondary word or phrase in a contrasting script. This type of sign is among the most popular items in the craft market and the second easiest to cut after a single-font name sign.
From Signs to Functional Projects
Once you’ve run three or four signs, the next step is a project that gets used, not just displayed.
Engraved cutting board: An end-grain maple or edge-grain walnut blank with a monogram, family name, or custom design V-carved into one face, finished with food-safe mineral oil or butcher block conditioner. These are the most reliably saleable CNC project because they combine function with personalization. A plain cutting board is a commodity. An engraved custom version commands significantly more.
Important material note: use kiln-dried hardwood with under 8 percent moisture content. Wet or green wood moves as it dries, causing the engraved design to open or close. Use a sharp V-bit and take light passes — hardwoods like maple and walnut will burn if you run too slow.
Pet memorial photo frame: A rectangular hardwood frame with the pet’s name, dates, and a small paw print or animal silhouette V-carved into the border. These are an emotional purchase and among the highest-converting personalized CNC products online. The geometry is simple (a rectangular pocket for the photo opening, V-carve on the border), which makes it accessible for beginners while producing a result that feels meaningful.
Geometric wall art: A panel of repeating triangles, hexagons, or interlocking shapes routed as pockets at varying depths, creating a three-dimensional shadow-play effect when lit from the side. No V-bit required — straight pocket cuts at different depths in plywood or MDF, painted a single color, look architectural and sophisticated. These are pure profile and pocket work, which means they’re a good stepping stone before learning V-carve toolpaths.
Boxes, Boards, and Functional Objects
Jewelry box: A flat-pack box design with finger joints cut by a straight bit, assembled with wood glue, with a lid that gets a V-carved monogram or floral design on top. Flat-pack boxes are a CNC staple because the machine handles every joint cut with the precision that hand-cutting box joints requires. Download a free parametric box generator online, input your dimensions, export the DXF file, and import it into your CAD/CAM software.
Piggy bank: A layered design — a stack of identically shaped plywood layers with a coin slot routed into the top layer, glued and clamped, then sanded smooth as a unit. Layered construction is one of the best introductions to 3D form on a machine that cuts flat stock: each layer is simple, but the assembled result has volume and presence.
Bookends: Two L-shaped hardwood pieces with an animal silhouette or geometric pattern profile-cut from the vertical face. Simple in construction (basic profile and pocket cuts), but high in perceived value when finished with oil or wax and presented as a set.
Cribbage board: One of the most technically satisfying beginner projects. A cribbage board requires drilling rows of evenly spaced holes (handled easily with a CNC pocket or drill toolpath), routing the track path, and optionally V-carving a design into the border. The CNC handles the precision hole spacing that would take hours by hand. Cribbage boards are a perennial craft fair seller with a loyal audience.
Understanding File Types: SVG, DXF, and Where to Get Them
CNC routing projects start with a digital file. The two most common vector formats are:
SVG (Scalable Vector Graphics): An XML-based format widely used in design tools like Adobe Illustrator, Inkscape, and Canva. SVGs import cleanly into most CNC CAD/CAM software (VCarve, Carbide Create, Easel) and are the most common format sold on Etsy and design marketplaces. If you download a free clipart graphic or buy a design file online, it’s likely an SVG.
DXF (Drawing Exchange Format): An AutoCAD-native format that carries precise dimensional data. DXF files import with exact measurements intact, making them the preferred format for parts that need to fit together (box joints, shelf brackets, puzzle pieces). Free DXF libraries at sites like 3axis.co and dxfforcnc.com offer thousands of downloadable patterns.
Vectric offers over 300 free project files on their website, each paired with a step-by-step video tutorial. For beginners using VCarve Desktop or VCarve Pro, these are the fastest way to go from download to finished cut without a design session.
When downloading files from any source: check that the file imports at the correct size (many SVG files are unitless and need scaling), that all paths are closed vectors (open paths cause toolpath errors), and that text has been converted to curves (live text in a vector file won’t translate to a CNC toolpath).
Material Selection for Beginner Projects
Pine and poplar: The beginner-friendly choices. Soft, inexpensive, easy to cut cleanly, and widely available in surfaced form from home improvement stores. Pine has visible grain that adds character to signs. Poplar is slightly harder and takes paint well. Both work with any bit speed and feed setup within normal hobbyist ranges.
Hardwood (oak, walnut, maple): Higher perceived value and better durability, but denser fibers require sharper bits, slightly slower feeds, and more attention to chip load to avoid burning. Walnut is the premium choice for cutting boards and serving boards. Maple is the standard for cribbage boards. White oak is weather-resistant enough for outdoor plaques.
Plywood (Baltic birch, hardwood-faced): The most versatile sheet material. Baltic birch plywood has void-free plies and cuts clean with a compression end mill. It’s the standard for flat-pack boxes, shelves, and layered art. Use 1/2-inch or 3/4-inch for structural pieces, 1/4-inch for layered assemblies.
MDF: Cheap, dead flat, and machines cleanly, but heavy and not moisture-resistant. Good for painted sign blanks and decorative panels. Avoid for cutting boards, outdoor signs, or any piece that will see moisture.
The V-Bit vs. Straight Bit Decision
Most beginners wonder when to use a V-bit versus a straight end mill. The answer hinges on what you want the cut to look like.
V-bit (typically 60 or 90 degrees): Use for lettering, logos, and any design where you want tapered grooves that widen as they deepen. The resulting look is the classic hand-carved sign aesthetic. V-carve toolpaths in software like VCarve handle all the depth calculations automatically — you just specify the bit angle and the software figures out how deep to go.
Straight or upcut end mill: Use for pocket cuts with flat bottoms (recessed backgrounds, inset panels, flat-bottomed letters), for profile cuts around the perimeter of a shape, and for all through-cuts. If you want the background of a sign pocketed flat (so the letters stand raised), that’s a straight bit pocket followed by a V-carve cleanup pass on the corners.
Many sign projects use both: a V-bit for fine text and detail, a straight end mill to clear the background pocket. VCarve calls this a “V-carve with clearance tool” toolpath and handles the coordination automatically.
Five Beginner Projects in Difficulty Order
- House number plaque — Rectangle, bold numbers, one tool (V-bit), one pass. Finish with exterior poly. Teaches zero-setting and V-carve workflow.
- Family name sign — Oval or rectangle, one or two fonts, V-carve toolpath. Teaches text layout and paint-and-scrape finishing.
- Engraved cutting board — Hardwood blank, monogram or small graphic, V-carve on show face. Teaches working in hardwood and food-safe finishing.
- Flat-pack box (jewelry box or keepsake box) — Profile and pocket cuts only, finger joints, assembly glue-up. Teaches precision profiling and part fitting.
- Geometric wall art panel — Multiple pocket depths in plywood or MDF, painted monochrome. Teaches depth-of-cut control and large-panel workholding.
Small Scenes: What It Actually Looks Like
You secure a 3/4-inch poplar blank to the spoilboard with toe clamps, load a 60-degree V-bit, and zero the Z axis with a touch probe. You hit run. The bit traces the outline of each letter at varying depths — shallow on the thin hairline strokes, deeper on the thick ones — and in nine minutes you have a name sign that looks like it came from a craft boutique. You sand it lightly with 220, brush on a coat of latex paint, let it dry, then drag a cabinet scraper across the raised surface to expose the wood underneath the paint. The letters pop, crisp and dark, against the light field. That’s the moment most CNC hobbyists understand they’ve found a hobby with a long runway.
Conclusion
The best CNC router project is the one that teaches you something and produces a result worth keeping or selling. Start with signs because they compress the entire workflow into one short session. Move to functional objects — cutting boards, boxes, boards — when you want projects that get used. Use project files from trusted sources (Vectric, Etsy, CNCCookbook) until you’re comfortable designing from scratch.
Four takeaways:
- Signs teach the complete CNC workflow faster than any other project type.
- SVG files work for artistic designs; DXF files work when precise dimensions matter.
- V-bits and straight end mills are not interchangeable — use both together on complex sign work.
- Pine and poplar for practice; hardwood for pieces you intend to sell or keep.
FAQ
What is a good first CNC router project? A V-carved house number plaque or family name sign in pine or poplar. It uses one bit, one toolpath type, and produces a finished result in under an hour, teaching you the complete workflow from file setup to finishing.
Where can I find free CNC project files? Vectric offers over 300 free project files with tutorial videos at vectric.com. CNCCookbook maintains a free DXF library. The 3axis.co and dxfforcnc.com sites offer free DXF downloads. Etsy has a large market for paid SVG and DXF files, including beginner project bundles.
What is the difference between SVG and DXF files? SVG is a web-native vector format used in design tools like Illustrator and Inkscape, good for artistic projects. DXF is an AutoCAD-native format that carries exact dimensions, making it better for parts that need to fit together. Most CNC CAD/CAM software accepts both.
What wood is best for CNC router signs? Pine and poplar are the beginner choices: affordable, available, and easy to cut cleanly. For higher-value signs and outdoor use, white oak and cedar are more durable. Hardwoods like walnut and maple are standard for cutting boards and keepsake items.
Can I make money selling CNC router projects? Many hobbyists sell personalized signs, engraved cutting boards, and custom plaques on Etsy and at craft fairs. The most consistently profitable items are customizable (personalized names, addresses, dates), reproducible, and have high perceived value relative to material cost. Signs, cutting boards, and pet memorials are reliable sellers.
What is a V-carve toolpath? A V-carve toolpath uses a V-bit to cut designs where the depth of cut automatically varies based on the width of the stroke. Narrow strokes are cut shallow (keeping them narrow); wide strokes are cut deeper (letting the V geometry widen them). The result is the tapered, hand-carved look common in wood signs.
Do I need to design my own project files? No. Hundreds of free and paid project files are available online in SVG and DXF format. Most beginners use downloaded files for their first ten to twenty projects before starting to design original work. Your CAD/CAM software likely also includes a clipart library.
What finish should I use on a CNC wood sign? For indoor signs, a coat of latex paint followed by a cabinet scraper across the raised faces reveals the wood under paint for a classic contrast finish. For natural wood signs, spray lacquer or a wiping varnish is clean and quick. For outdoor signs, exterior oil or polyurethane is required for weather resistance.