
3D Scanner for CNC Router: The Workflow for Reproduction Carving
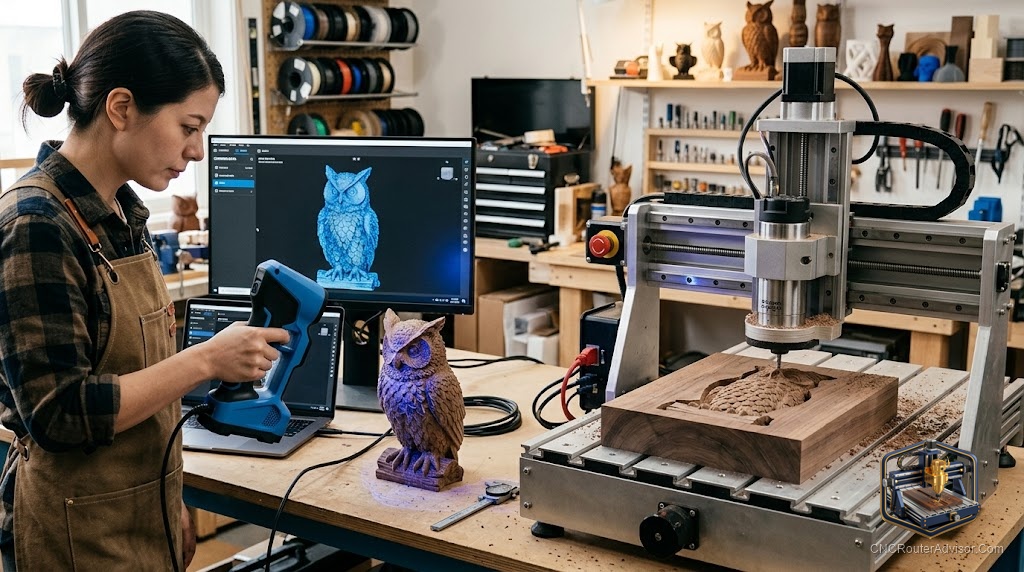
The ornate mantelpiece detail has been in the family for eighty years. It’s also missing a section, and there’s no drawing, no template, no measurement that captures the original profile. There is, however, an intact matching section on the other side of the fireplace. A 3D scanner captures that section. The CNC router reproduces it. The repair is indistinguishable from the original.
Using a 3D scanner with a CNC router means capturing a physical object’s geometry digitally and using that data to drive the router in reproducing the shape. The scanner and the CNC are separate devices; the workflow connects them through a mesh file and CAM software.
The direct answer: for woodworking reproduction and reverse-engineering applications, the Revopoint RANGE 2 and the Artec Eva are the most commonly used handheld scanners with CNC CAM tools. Both export STL for direct import into Vectric Aspire or Carveco. The Revopoint is more accessible; the Artec is more accurate. Both require white scanning spray on dark matte surfaces.
The Scan-to-CNC Workflow
Step 1: Scan the Original
Position the object on a rotating turntable or scan freehand using the scanner’s tracking algorithm. Capture the complete surface in overlapping passes.
Step 2: Process the Scan
In the scanner’s processing software (RevoScan, Artec Studio), merge passes, fill holes, and export as STL. Quality of this step directly affects carving quality.
Step 3: Clean the Mesh
In Meshmixer, repair non-manifold edges, reduce polygon count if needed for CAM performance, and check for undercuts.
Step 4: Import into CAM
Open in Aspire or Carveco. Scale to the correct output dimensions. Set up roughing and finishing toolpaths.
Step 5: Cut
Generate G-code, send to machine, cut the reproduction.
Where This Workflow Excels
Architectural restoration: Replacing damaged decorative elements from surviving matches.
Antique reproduction: Creating additional pieces that match existing carved elements.
Custom carved elements from sculptures: Scanning a clay prototype and machining it in wood.
Mold making: Scanning a master pattern and cutting the mold cavity.
Where It Doesn’t Work Well
The scan workflow doesn’t work well for objects with highly reflective surfaces (lacquer, metal, glass) or very dark surfaces (dark walnut without scanning spray). It also doesn’t produce precise mechanical tolerances - for parts that need to fit within 0.1mm, CAD modeling from measurements is more reliable than scanning.
Verdict
For reproduction carving and reverse-engineering decorative elements, a scanner adds genuine value to a CNC shop. The Revopoint RANGE 2 is the most accessible entry point for woodworking applications. The workflow from scan to cut is achievable in a single day for a clean original.
- Scan-to-CNC is a real, practical workflow for restoration and reproduction
- Process: scan, process mesh, clean in Meshmixer, import to CAM, cut
- Works best on matte medium-tone surfaces without undercuts
- Revopoint RANGE 2 is the most common entry scanner in the CNC woodworking community
FAQ
Can I use a 3D scanner to reproduce a carved piece on my CNC router? Yes. Scan to STL, import into Aspire or Carveco, generate 3D toolpaths, cut.
What scanner accuracy do I need for CNC carving? For decorative carving, 0.5mm accuracy is sufficient. The Revopoint RANGE 2 achieves 0.05mm accuracy in good conditions.
Can I scan directly with the CNC machine? Some machines support probe digitizers for surface scanning. This approach is slower and lower resolution than handheld structured light scanners.
What surfaces are hard to scan? Dark matte surfaces, highly reflective surfaces, and translucent materials. Use white scanning spray to create uniform reflectance on difficult surfaces.
References
- Revopoint: revopoint3d.com
- Artec 3D: artec3d.com
- Meshmixer: meshmixer.com