
CNC Router Art: Techniques, Project Ideas, and Getting Started
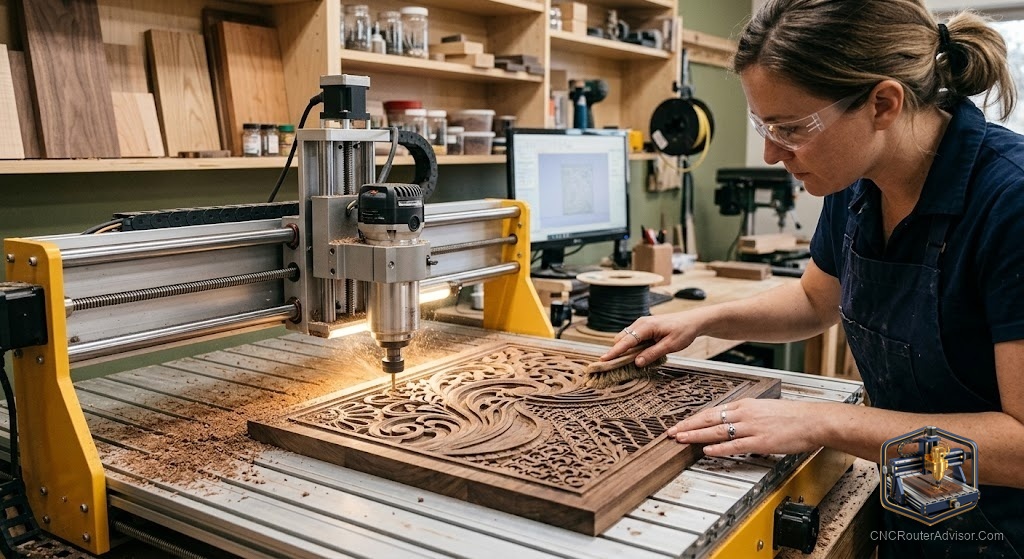
There is a moment, usually the first time a router traces a design you drew and lifts a clean relief out of a raw board, when CNC stops feeling like a machine tool and starts feeling like an art medium. CNC router art spans everything from crisp two-dimensional signage to sculptural three-dimensional reliefs, and it has opened fine detailed woodworking to people who could never carve it by hand. Whether you want to make wall art to sell, personalized gifts, or gallery-worthy reliefs, understanding the core techniques and the path to getting started turns the machine into a genuine creative tool.
CNC router art is the use of a CNC router to create decorative and artistic work, from flat two-dimensional designs and lettering to three-dimensional relief carvings and sculptures, by cutting, carving, and engraving wood, acrylic, foam, and other materials from digital designs. It combines digital design skills with an understanding of bits, toolpaths, and materials.
The short answer on getting started: begin with 2D and V-carve projects (signs, engraved art, geometric patterns) using a V-bit and a straight bit, learn your CAM software (Carbide Create, VCarve, or similar), then progress to 3D relief carving with a ball-nose bit once you understand the fundamentals. Start with simple designs on inexpensive material, and build up.
Core techniques of CNC router art
2D profiling and cutouts. Cutting shapes and silhouettes from flat stock, animal shapes, mandalas, geometric wall art, layered art. Uses straight/upcut bits following vector outlines. The most approachable starting point.
V-carving. A V-bit carves lines of varying width based on the geometry, creating crisp lettering and decorative detail with a hand-carved look. This is the technique behind most signs and much engraved art, and it is beginner-friendly and dramatic.
Engraving. Fine shallow detail with a V-bit or engraving bit, photos rendered as line art, intricate patterns, and text on plaques and gifts.
3D relief carving. The most advanced technique: a ball-nose bit makes multiple passes (roughing then finishing) to sculpt a three-dimensional relief, flowers, portraits, landscapes in relief, ornamental panels. Requires 3D models or relief files and more time, but produces the most striking results.
Inlay. Cutting a pocket and a matching plug (often contrasting wood or colored epoxy) that fit together, creating multi-color or multi-material art. V-carve inlay is a popular, impressive technique.
Layered and multi-material art. Stacking cut layers of wood or acrylic to build depth and dimension, mandalas, topographic maps, layered signs.
Materials for CNC router art
- Hardwoods (walnut, maple, cherry): premium finished art, beautiful grain, detailed relief.
- Plywood (especially Baltic birch): affordable, stable, great for painted and layered work.
- Acrylic: colorful, translucent, edge-lit, and layered art.
- MDF: cheap, uniform, ideal for painted signs and practice.
- Foam (HDU): sign board, prototyping, and large lightweight reliefs.
- Epoxy resin: for inlay and river-style accents.
The software and design path
- CAM software: Carbide Create (beginner-friendly, free with Shapeoko), Vectric VCarve and Aspire (Aspire adds full 3D modeling), and Fusion 360.
- Design files: SVG and DXF for 2D/V-carve; STL and relief (RLF) files for 3D. Buy vetted files, or design your own as skills grow.
- Bits: V-bit (lettering, V-carve), straight/upcut (profiles, pockets), ball-nose (3D finishing), and engraving bits (fine detail).
Getting started, step by step
- Start with a 2D or V-carve sign on inexpensive MDF or plywood using a V-bit and straight bit.
- Learn your CAM software by making simple projects, mastering toolpaths, feeds, speeds, and depth.
- Add engraving and inlay for more visual interest and value.
- Progress to 3D relief with a ball-nose bit and relief files once fundamentals are solid.
- Finish well: sanding, painting, staining, and sealing turn a good cut into finished art.
The verdict
CNC router art is one of the most rewarding uses of a router, accessible enough to start with a simple V-carved sign and deep enough to pursue sculptural 3D relief for years. Begin with 2D and V-carving to build software and machine fundamentals, then progress to engraving, inlay, and 3D relief as your skills grow. Start simple, use inexpensive material while learning, and invest as much in finishing as in cutting, because presentation is what turns a clean cut into art worth selling or displaying.
Three takeaways: start with 2D profiling and V-carving (V-bit and straight bit) before attempting 3D relief; match technique to bit, V-bit for lettering and inlay, ball-nose for 3D finishing; and treat finishing (sanding, paint, seal) as part of the art, not an afterthought.
FAQ
What is CNC router art? Decorative and artistic work made with a CNC router, from flat 2D designs and V-carved lettering to 3D relief carvings, in wood, acrylic, foam, and more, created from digital designs.
How do I get started with CNC router art? Begin with 2D and V-carve projects (signs, engraved art) using a V-bit and straight bit, learn your CAM software on simple designs and inexpensive material, then progress to inlay and 3D relief carving.
What bits do I need for CNC router art? A V-bit for lettering, V-carving, and inlay; a straight/upcut bit for profiles and pockets; a ball-nose bit for 3D relief finishing; and engraving bits for fine detail.
What software is used for CNC router art? Carbide Create (beginner-friendly), Vectric VCarve and Aspire (Aspire adds 3D modeling), and Fusion 360. Design files come as SVG/DXF (2D) and STL/relief files (3D).
What is V-carving? A technique where a V-bit carves lines of varying width based on the design geometry, producing crisp lettering and decorative detail with a hand-carved look. It is the basis of most CNC signs and much engraved art.
What is CNC inlay? Cutting a pocket and a matching plug (contrasting wood or colored epoxy) that fit together to create multi-color or multi-material art. V-carve inlay is a popular, striking technique.
What materials are best for CNC art? Hardwoods (walnut, maple) for premium finished pieces, Baltic birch plywood for affordable and layered work, acrylic for color and edge-lit art, MDF for painted signs, and HDU foam for sign board and large reliefs.
References
- Vectric, Free CNC Art Projects and Tutorials: https://www.vectric.com/vectric-community/free-projects/
- Carbide 3D, Learn: Getting Started with Carbide Create (V-carve, 2D, 3D): https://carbide3d.com/carbidecreate/
- CNCRouterInfo, CNC Router Bits Explained (V-bit, ball-nose, engraving): https://cncrouterinfo.com/guides/cnc-router-bits/
- Bubble Relief, CNC Router Projects for Beginners (art project ideas): https://bubblerelief.com/cnc-router-projects-for-beginners/
- Sienci Labs, CNC Project Ideas and Resources (relief, inlay, signs): https://resources.sienci.com/