
CNC Router Carving: Techniques, Project Ideas, and Setup Guide
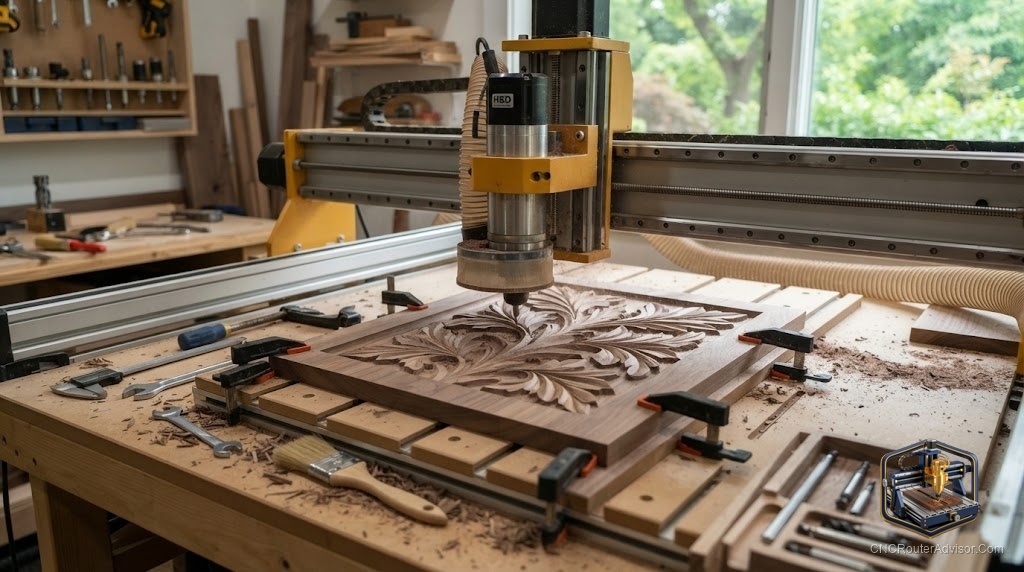
Carving on a CNC router is where the machine stops feeling like a tool and starts feeling like something else entirely. You load a file, press start, and watch the bit trace contours across the wood, building up depth and detail with each pass, until a face or a landscape or a decorative panel appears that no hand carver could replicate in that time. It is genuinely magical the first time, and the technique behind it is learnable.
This guide covers how CNC carving works, the project types that make it shine, the bit choices and file formats that produce clean results, and the setup habits that separate a crisp carving from a ragged one.
What CNC router carving is
CNC carving uses the router’s three axes to cut a design that varies in depth across the surface. Unlike a simple pocket or profile cut, where the Z depth is constant, a carving changes depth continuously as the machine moves, building up texture, dimension, and artistic form. The machine traces many closely spaced passes at varying Z depths to create the finished surface.
Carving falls into two broad types. Relief carving produces a raised or recessed three dimensional design: a portrait, a scenic panel, a decorative motif. V-carve work uses a V-shaped bit to cut lettering and line art with a natural taper and depth that follows the design. Both rely on the same principle: the machine moves in all three axes at once to create depth variation.
The short answer
For relief carving, you need a 3D model or a depth image, CAM software that generates 3D toolpaths, a ball nose bit for the finishing pass, and a rigid machine with enough Z travel for your design depth. For V-carving, you need a vector file, a V-bit matched to your font and detail scale, and CAM software that understands V-carve toolpaths. Both reward sharp bits, a well squared machine, and firm workholding. The most common beginner mistake is starting too ambitious: start with a small, simple carving, learn the software workflow, and scale up from there.
V-carving: letters and line art
V-carving is the technique people learn first because the results are immediately beautiful. A V-bit enters wood at a consistent angle, and the depth it cuts is determined by the width of the feature it traces: wide features cut deeper, narrow features stay shallow. This creates a natural, tapered look in lettering and decorative line art that a flat bit cannot match.
The design file is a vector, usually SVG or DXF, with clean, closed paths. The CAM software calculates where the bit should go and how deep based on the vector path width and the bit angle. Common applications are name signs, address plaques, quote signs, engraved cutting boards, and detailed decorative borders. V-bits come in 60 and 90 degree angles: 60 degree for fine detail and small text, 90 degree for bolder forms.
Relief carving: dimensional sculpture
Relief carving adds a dimension beyond V-carving. You start with a three dimensional model or a grayscale depth map, and the CAM software generates toolpaths that trace the surface at varying Z heights. The result is a panel that reads as sculpture: a carved face, a topographic map, an animal in full dimensional form.
A two stage approach gives the cleanest results. The first pass uses a larger ball nose or flat bit to remove the bulk of material quickly. The second finishing pass uses a small ball nose bit with tight step over spacing to trace the final surface detail. Smaller step over means finer surface, longer machine time. Match the step over to the detail your design needs.
Software for carving
Carving needs CAM software that understands the carving operation. For V-carving, Vectric software including Cut2D, VCarve Desktop, and VCarve Pro are the most widely used tools in the hobby and small shop market, with intuitive V-carve toolpath generation. For 3D relief work, VCarve Pro and Vectric Aspire add full 3D toolpath support. Fusion 360 and Carveco Maker are capable alternatives. Confirm the software you choose handles the type of carving you plan, because not all CAM tools generate V-carve and 3D carving toolpaths.
Project ideas by technique
V-carving suits personalized name signs, address plaques, engraved cutting boards, quote signs, house number plaques, cribbage boards, and detailed box lids. Relief carving suits decorative wall panels, sculpted furniture fronts, animal silhouette art, topographic maps, portrait plaques, and large scale nature scenes. Combining both in a single piece, V-carved text over a relief carved background, produces some of the most impressive work a router can make.
Setup habits that separate clean carvings from rough ones
A sharp bit matters more in carving than in any other operation because the eye follows curved surfaces closely and sees tool marks easily. Replace bits when quality drops. A rigid machine matters because the finishing pass uses light forces on tight tolerances, and flex shows in the surface. Workholding must be solid because any movement during a long finishing pass ruins the detail. And Z zeroing must be accurate, because even a small error in Z shows across the carving depth.
Comparison: V-carving vs relief carving
| Factor | V-carving | Relief carving |
| Design input | Vector file (SVG, DXF) | 3D model or depth image |
| Primary bit | V-bit, 60 or 90 degree | Ball nose end mill |
| Typical projects | Signs, lettering, line art | Sculpture, portraits, panels |
| Machine time | Moderate | Can be long for fine step over |
| Learning curve | Lower, good first project | Higher, more software knowledge |
For carving software, Vectric products are the standard: https://www.vectric.com. For a machine with enough Z travel and rigidity for carving, the Genmitsu PROVerXL 4030 is a strong platform at this listing. The Genmitsu 4040 PRO MAX is a capable mid size option at this listing.
The verdict
CNC router carving is one of the most rewarding things the machine can do, combining precision automation with genuine artistic output. V-carving is the entry point: accessible, visually impressive, and learnable in a weekend. Relief carving is the next step: more demanding of software knowledge and machine time, but capable of true sculptural work. Sharp bits, a rigid machine with adequate Z travel, solid workholding, and CAM software that understands your carving operation are the four things that determine whether a carving looks professional or rough. Start small, master the software workflow, and scale up from there.
Frequently asked questions
What is V-carving? V-carving uses a V-shaped bit that cuts deeper in wide areas and shallower in narrow ones, following a vector design to produce tapered lettering and line art with a natural, carved look. It is the most accessible carving technique for beginners.
Do I need special software for CNC carving? Yes, for both V-carving and 3D relief you need CAM software that generates the appropriate toolpaths. Vectric products are the standard in the hobby market. General CAM tools that do not support these operations cannot generate carving toolpaths.
What bit is best for relief carving? A ball nose end mill traces curved surfaces smoothly. Use a larger one for rough material removal and a small radius ball nose for the finishing pass. Smaller radius gives finer detail but longer machine time.
How long does a CNC carving take? V-carvings of signs and lettering typically take minutes to an hour depending on size and complexity. Full relief carvings with a fine step over finishing pass can run several hours. Preview estimated time in your CAM software before committing.
Can any CNC router do carving? Yes, with enough Z travel for the design depth, a rigid frame for clean finishing passes, and CAM software that supports the carving operation. Most standard three axis routers can carve within their Z travel limits.
What wood is best for carving? Hardwoods like maple, walnut, and cherry give the cleanest edges and finest detail. Softer woods like pine and poplar carve faster but can fuzz at fine edges. MDF carves smoothly and takes paint well for painted signs.
References
- Vectric software: https://www.vectric.com
- Bubble Relief, CNC Router Projects for Beginners: https://bubblerelief.com/cnc-router-projects-for-beginners/
- Instructables, DIY CNC Router: https://www.instructables.com/DIY-CNC-Router/