
Arduino CNC Router Kit Guide: Compatibility, Installation, and Upgrade Choices
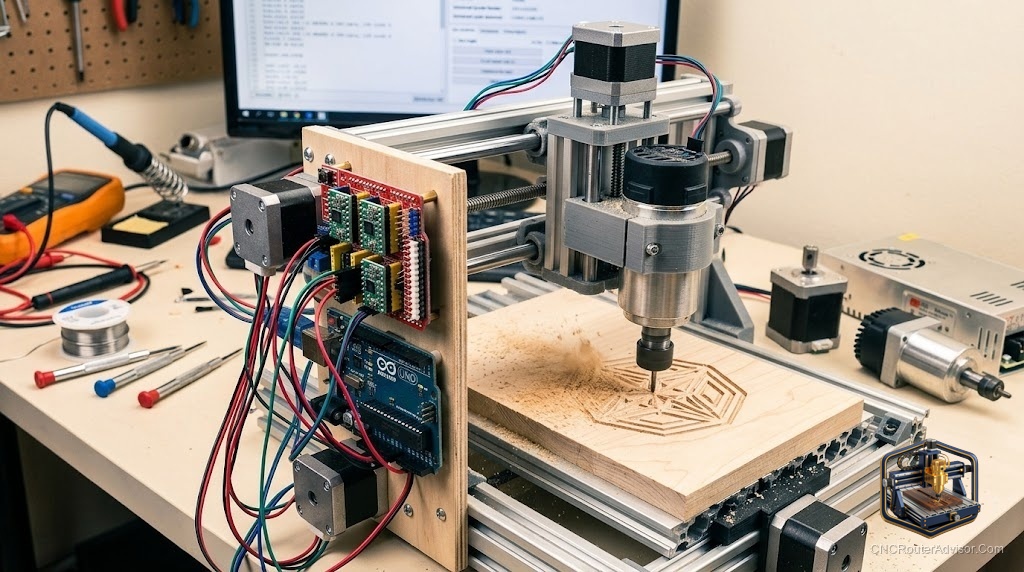
There are two kinds of people who search for an “Arduino CNC router kit.” One wants a complete machine that happens to run on Arduino/GRBL. The other wants the electronics kit - the board, drivers, and motors - to build or upgrade a machine themselves. This guide serves both, because the parts are the same story told at different scales. Here’s how to choose, connect, and upgrade.
What’s in an Arduino CNC control kit
At its heart, an Arduino-based control kit is a small stack of parts that turns G-code into motion:
- The board. An Arduino Uno (or compatible) flashed with GRBL - the GRBL controller that reads G-code.
- A CNC shield. A board that plugs onto the Arduino and holds the stepper drivers, breaking out connections for motors, limit switches, and the spindle.
- Stepper drivers. DRV8825 or A4988 modules that amplify signals to the motors.
- Stepper motors. Usually NEMA 17 for small machines, NEMA 23 for larger, stiffer builds.
- Endstops/limit switches for homing and safety.
A classic bundle like the RATTMMOTOR CNC shield V3 with DRV8825 drivers gives you the shield-and-driver core, while the more complete RATTMMOTOR full kit (Uno + shield + drivers + NEMA 17 + limit switches) bundles nearly everything the control side needs. If you prefer A4988 drivers for a lighter build, the ACEIRMC CNC shield V3 with A4988 set is a budget alternative.
Choosing your motors
Motor choice follows the machine you’re building:
- NEMA 17 motors suit small, light routers - a set like the STEPPERONLINE NEMA 17 5-pack is a cheap, reliable way to drive a 3018-class build, and a higher-torque STEPPERONLINE NEMA 17, 92 oz-in 3-pack stiffens things up.
- NEMA 23 motors are for larger, heavier machines that need more torque - the STEPPERONLINE NEMA 23, 425 oz-in drives a substantial gantry, while the STEPPERONLINE NEMA 23, 178.5 oz-in is a solid mid-torque value.
Remember: DRV8825/A4988-based Arduino shields are best matched to NEMA 17 and smaller NEMA 23 motors. Big NEMA 23 builds often move to external drivers.
Compatibility notes
- Firmware. The kit runs GRBL; confirm your board is GRBL-compatible and flash the current version.
- Drivers vs. motors. Match driver current limits to your motor ratings - set the driver potentiometers (Vref) correctly or you’ll cook drivers or lose torque.
- Mechanics. The electronics drive whatever mechanics you have - ball screw, lead screw, timing belt, riding on linear rails or V-wheels. The kit doesn’t care, but your accuracy does.
- Spindle control. Basic kits switch a spindle on/off; a VFD spindle needs appropriate control wiring.
Installation walkthrough
- Flash GRBL onto the Arduino.
- Seat the shield and install the stepper drivers (mind orientation - backwards kills drivers).
- Set driver Vref to match your motors.
- Wire motors, endstops, and power. Keep grounds clean.
- Configure GRBL - steps-per-mm, feed, acceleration - and test each axis.
- Square and calibrate before cutting anything real.
Upgrade choices
As you grow, common upgrades include: higher-torque motors, a beefier power supply, external drivers for NEMA 23, adding limit switches if you skipped them, and stepping up to a VFD spindle. If building from parts feels like too much, remember a complete GRBL machine like the Genmitsu 3018-PRO gives you the same Arduino/GRBL experience assembled and ready.
The bottom line
An Arduino CNC router kit is a small, logical stack - Uno, shield, drivers, motors, endstops - that turns G-code into precise motion. Match your drivers to your motors, your motors to your machine size, flash and calibrate GRBL, and wire it cleanly. Whether you build from parts or start with a complete GRBL machine, you’ll end up with the most understandable, upgradeable platform in hobby CNC.
Frequently asked questions
NEMA 17 or NEMA 23? NEMA 17 for small, light routers; NEMA 23 for larger, heavier builds. Match the motor to your machine’s mass and the drivers to the motor.
Can Arduino shield drivers run big NEMA 23 motors? For small-to-mid NEMA 23, yes; large high-current motors usually need external drivers rather than shield-mounted DRV8825/A4988 modules.
Is building a kit worth it vs. buying a machine? Building teaches you everything and is very upgradeable. If you just want to cut, a complete GRBL machine gets you there faster.