
Add Laser to CNC Router: Compatibility, Setup, and Upgrade Options
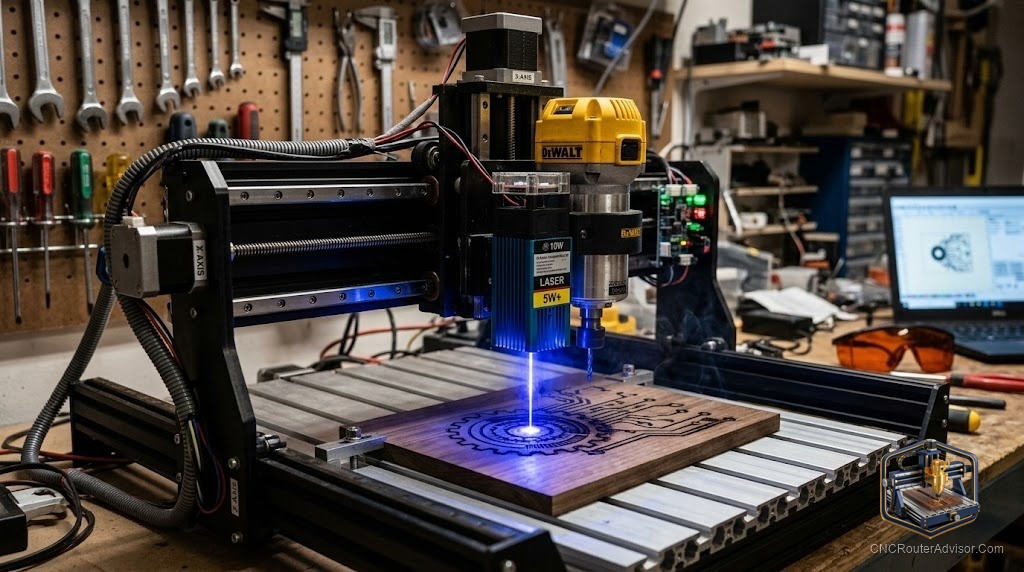
Your CNC router cuts wood, acrylic, and aluminum. But you keep watching laser engravers produce photo-quality images in leather and wood in minutes, and you wonder whether you can add that capability to the machine you already own instead of buying another one. The answer is yes, in most cases, and the upgrade is more straightforward than it looks once you understand the connection.
Adding a laser to a CNC router means attaching a diode laser module to the machine’s Z carriage and connecting it to the spindle PWM output on the controller. The same motion system that moves the router bit now moves the laser head. The same G-code that programs the cutting path programs the engraving raster or vector path. The machine runs both modes from one controller, and you switch between them in software.
Here is the short answer for compatibility: if your CNC router runs GRBL firmware and has an accessible spindle PWM output pin, you can add a diode laser module. Most hobby machines (Genmitsu 3018, 4040, Axiscreat, Sculpfun hybrid machines) support this. Machines running Mach3 or a proprietary industrial controller require extra steps and may not support direct laser mode.
What you are actually adding
A diode laser module is a self-contained unit with a laser diode, a focusing lens assembly, and a control board that accepts a PWM signal to modulate the beam power. You mount it to the Z carriage or beside the spindle, wire the signal lead to the GRBL spindle enable pin, and connect power to the machine’s supply or a dedicated power supply.
The beam fires when the controller sends M3 Sxxx (spindle on at speed level xxx, reinterpreted as laser power percentage). It turns off with M5. Your laser software generates this G-code automatically.
This is different from adding a CO2 laser tube, which requires a separate machine with an optical mirror delivery system, a high-voltage power supply, and a water-cooled tube. CO2 lasers cannot be added to a CNC router gantry as a module. If you want CO2 laser capability, buy a dedicated CO2 laser machine.
Which machines support this upgrade
Genmitsu 3018-PRO and 3018-PROVer: The Genmitsu GRBL board has a laser output header that connects directly to compatible diode modules. Genmitsu sells their own 10W module for these machines.
Genmitsu 4040-PRO: Same board, same PWM output, larger work area. The larger bed benefits engraving more than the 3018’s 300x180mm area.
Axiscreat A6060 (FluidNC): FluidNC is GRBL-compatible and supports laser mode via the same parameter set. The 600x600mm bed is a strong engraving canvas.
Custom GRBL builds (8020, OpenBuilds, etc.): Any machine running GRBL firmware has the laser mode parameter built in. Access via $32=1.
Mach3 or industrial controller machines: These require a dedicated laser controller or a PWM output board that converts the controller’s analog output to a laser-compatible signal. Significantly more complex.
Power levels: which laser does what
| Power | What it does | Best for |
|---|---|---|
| 5W | Engraving wood, leather, coated surfaces | Hobbyists, light engraving |
| 10W | Same, plus cutting balsa and thin plywood (2-3mm in multiple passes) | Entry production |
| 20W | Cuts 3mm wood in one pass, 6mm in 2-3 passes | Hobbyist/light production |
| 33-40W | Cuts 15-20mm wood in one pass | Serious cutting and fast engraving |
For a CNC router add-on focused on engraving, 10W is the practical sweet spot. You get meaningful engraving speed and light cutting without the enclosure and ventilation demands of 40W diode operation.
Three verified laser modules for CNC router integration
Genmitsu 10W Laser Module (Genmitsu 3018/4040 compatible)
Factory-designed for Genmitsu machines with a drop-in bracket and pre-made cable for the board connector. 10W optical output, 0.1mm minimum spot size, compatible with GRBL laser mode.
Honest flaw: the bracket is machine-specific. On other brands of CNC router, you need to fabricate or source a different mount.
xTool 10W Laser Module (with compressed spot)
A higher-resolution 10W module with a 0.06x0.06mm compressed spot for fine detail engraving. The compressed spot is the feature: photo engraving benefits from a smaller spot because more pixels fit per millimeter, making gradations smoother.
Honest flaw: designed primarily for xTool machine frames. Adapting to other CNC gantries requires a custom mount.
Sculpfun S9 5.5W Laser (entry level, upgradable)
A 5.5W diode module with a simple mount that attaches to most standard 2020 extrusion carriage designs. The most accessible entry point for testing whether laser engraving fits your workflow before investing in higher power.
Honest flaw: 5.5W is engraving-only in practical terms. Do not expect meaningful wood cutting at this power level.
Setting up the laser: step-by-step
-
Wire the module. Connect signal to the GRBL PWM/spindle enable pin. Connect power to the appropriate voltage (12V or 24V depending on the module). The module wiring diagram specifies both.
-
Mount the module. Use the factory bracket or fabricate a mount that places the laser head with a clear downward path to the bed and access to adjust focus.
-
Set GRBL laser mode. Connect via your sender, send
$32=1. This enables beam-only-while-moving behavior that prevents burn spots at zero speed. -
Set maximum laser power.
$30in GRBL sets the S-value that corresponds to 100% power. Match this to your laser module’s documentation. -
Install LightBurn. LightBurn is the standard software for laser operation from GRBL machines. It handles raster engraving, vector cutting, and imports photos, SVGs, and DXF files.
-
Focus the module. Set the distance from the lens to the material surface according to the module’s specified focal length. Most modules include a focus spacer or gauge.
-
Test with scrap. Run a power/speed calibration grid on scrap wood before your first real job.
Running both router and laser on the same machine
You can run both functions on one machine, but not simultaneously. The approach depends on your setup:
Swap method: Mount the laser on the carriage in place of the spindle (or remove the spindle and bolt on the laser). Change the GRBL parameter and use LightBurn for laser jobs, your normal sender for cutting jobs.
Offset method: Mount the laser beside the spindle using a fixed Z-height bracket. The laser has a fixed Z position; it does not travel in Z. Define the X-Y offset between spindle center and laser center as a tool offset in your workflow. Switch between them by homing, changing tool offsets, and switching GRBL mode.
The offset method is more convenient for frequent switching but requires careful offset calibration so the laser hits where the router cut, not half an inch beside it.
Safety
Diode lasers at any wattage are a permanent eye injury hazard when viewed without protection. These are requirements, not suggestions:
- Rated optical safety glasses for the laser wavelength (typically 440nm to 450nm for blue diode lasers)
- Fume extractor with activated carbon filter during engraving
- Fire watch: never run unattended
- Enclosure for 20W and above
Verdict
Adding a diode laser module to a GRBL CNC router is a practical, relatively low-complexity upgrade that adds engraving capability without a second machine. For Genmitsu owners, the manufacturer’s own 10W module is the easiest path. For machines on 2020 extrusion, most modules mount with a compatible bracket.
Four takeaways:
- Confirm your controller has a GRBL-compatible PWM output before buying any module.
- Choose power based on use: 10W for engraving, 20W or higher if you also want to cut thin wood.
- Install LightBurn. It is the standard software for this work and worth the license.
- Follow the safety requirements before the first test burn. Eye damage from laser exposure is immediate and irreversible.
FAQ
Can any CNC router accept a laser module? Any machine running GRBL with an accessible spindle PWM output pin can accept a diode laser module. Machines on proprietary or industrial controllers require extra steps and may not support laser mode natively.
What GRBL setting enables laser mode?
Send $32=1 to your GRBL controller. This enables beam-on-while-moving behavior required for proper laser engraving.
Do I need special software for laser engraving? LightBurn is the standard and most capable option. LaserGRBL is a free Windows alternative. Both generate GRBL-compatible G-code from images and vectors.
Can I leave the spindle on the machine and also use the laser? Yes, using the offset mount method. Mount the laser module beside the spindle with a fixed Z-height bracket, define the X-Y offset between them, and switch between cutting and engraving by changing tool offsets and GRBL mode.
Is a 10W laser enough for wood engraving? Yes, 10W produces good engraving results in wood, leather, and coated surfaces. For cutting wood over 3mm, you need 20W or higher.
References
- GRBL documentation, Laser Mode: https://github.com/gnea/grbl/wiki/Grbl-v1.1-Laser-Mode
- LightBurn Software documentation: https://docs.lightburnsoftware.com
- SainSmart Genmitsu laser module documentation: https://docs.sainsmart.com