
Add Laser Engraver to CNC Router: Compatibility, Setup, and Upgrade Options
You run a wood sign on the CNC router and it comes out great. Then a customer asks for a photo-realistic portrait in the corner of the sign, the kind of fine-toned image that a V-bit carving can approximate but never really nail. A laser engraver does that well: it modulates its power dot by dot to produce photographic gradation in wood, leather, and coated surfaces with detail a mechanical cutter cannot match.
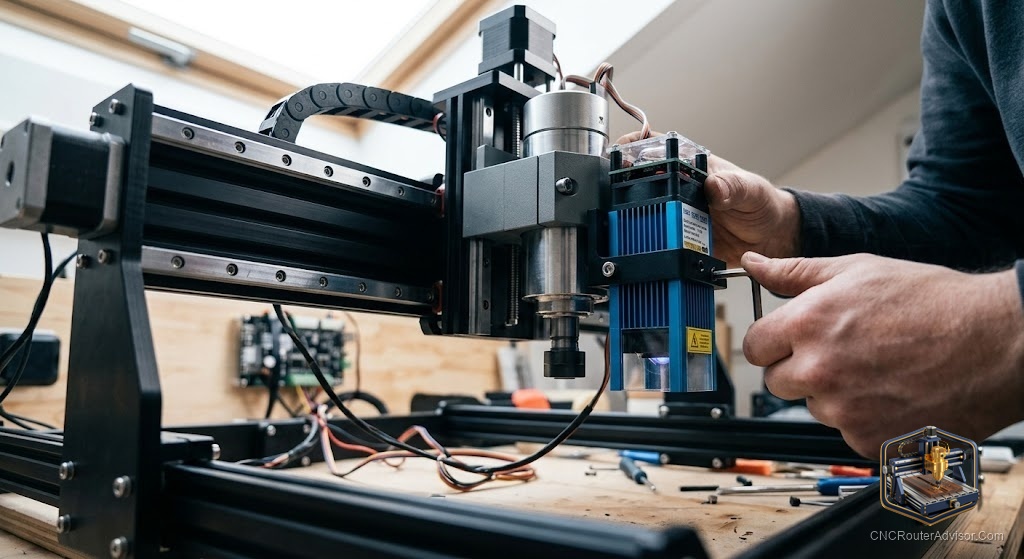
Adding a laser engraver module to an existing CNC router is one of the most practical upgrades you can make to a GRBL-based machine, and it is genuinely a bolt-on in most cases. The machine already has the gantry, the motion system, and a G-code controller. The laser module plugs into the spindle PWM output, mounts to the Z carriage, and runs the same G-code in a different mode.
Here is the short answer on whether your machine supports this: if your CNC router runs GRBL and has an accessible spindle enable or PWM output pin on the controller, you can add a diode laser module. The two main things to confirm are the PWM pin and a compatible mounting bracket for your carriage.
How a laser engraver module works on a CNC router
A GRBL controller uses the S (spindle speed) command in G-code to output a variable voltage signal (PWM) on the spindle enable pin. Spindle firmware uses this to set RPM via the VFD. Laser firmware uses the same signal to set laser power: higher S value means brighter laser, lower means dimmer or off.
When you switch a GRBL machine to laser mode (by setting the $32=1 parameter), the controller enables beam-on-only-while-moving behavior and responds to M3/M4 spindle commands as laser on/off. Your laser engraving software (LightBurn, LaserGRBL) sends M3 Sxxx to fire the laser at x percent power and M5 to turn it off. The machine scans across the image one line at a time, modulating power to produce light and dark areas.
This means the same controller that runs your cutting jobs runs your engraving jobs. You swap the spindle for the laser module (or leave both and offset the laser to the side with a fixed Z offset), change the GRBL mode, load the engraving file in LightBurn, and run.
What a diode laser engraver can do on a CNC router
Modern diode laser modules at the 10W to 40W range handle:
- Wood engraving: photo-realistic portraits, detailed illustrations, and text in any wood species. Tonal range from light tan to deep char depending on power and speed.
- Leather engraving: crisp, dark marks on natural and vegetable-tanned leather. Does not cut through medium-weight leather at hobby power levels.
- Anodized aluminum: removes the anodize layer to expose bright aluminum beneath, producing dark-on-silver contrast. This is the standard method for product branding and awards.
- Coated metals: any powder-coated or painted metal surface. The laser removes the coating to expose the base.
- Acrylic engraving (colored only): colored and frosted acrylic absorbs the diode wavelength and engraves well. Clear acrylic transmits the visible wavelength and does not engrave effectively.
- Cutting thin wood: a 20W or higher diode laser cuts 3mm basswood cleanly in one pass. 6mm wood requires two to three passes at lower speed.
Choosing the right laser module power
More optical watts means faster engraving and deeper cutting. For context:
- 5 to 10W: engraving in wood, leather, and painted surfaces. Cutting is limited to very thin materials (paper, 1mm to 2mm basswood). Good entry point.
- 20W: cuts 6mm wood cleanly and engraves faster. The practical middle tier for hobbyists who do both cutting and engraving.
- 40W: cuts 10mm to 15mm wood in a few passes, cuts thin acrylic (colored), and engraves at production speed. The top of the diode class.
Verified picks:
xTool 10W Diode Laser Module
A 10W compressed-spot diode laser with a 0.06x0.06mm focus point for fine engraving detail. Compatible with xTool’s own machines and adaptable to other GRBL-based machines with an optional bracket. The compressed spot improves text sharpness and detail resolution over standard diode modules.
Honest flaw: 10W limits practical cutting to wood under 5mm. For thicker material cutting, you need more power.
Sculpfun S30 Ultra 33W Diode Laser Module
A 33W diode module on the Sculpfun S30 Ultra machine platform (the module is also sold separately). Cuts 20mm basswood in a single pass and engraves at noticeably faster speeds than 10W units. The air assist nozzle (included) blows smoke away from the focal point, reducing char and improving cut edge quality.
Honest flaw: 33W means elevated safety requirements. An enclosure and fume extraction are not optional at this power level.
Genmitsu 10W Laser Module for 3018 and 4040 machines
A 10W diode laser module designed specifically to fit Genmitsu 3018-PRO, 3020-PRO, and 4040-PRO machines with a factory-compatible mounting bracket. The bracket alignment matches the existing carriage, making this the straightforward add-on for owners of those machines.
Honest flaw: 10W is adequate for engraving but cutting anything beyond paper and thin balsa requires multiple slow passes.
Installation steps for a GRBL CNC router
-
Check the controller pinout. Find the spindle enable pin (usually labeled SpEn or Laser on GRBL boards). Confirm it outputs PWM at 5V or 12V depending on your module requirement.
-
Mount the laser module. Use the bracket specific to your machine and carriage design. The laser lens should be aimed directly down, not angled.
-
Wire the module. Connect the signal wire to the PWM pin, power to the board’s 12V or 24V supply or a separate power supply. Follow the module’s wiring diagram.
-
Enable laser mode in GRBL. Connect via a G-code sender and send
$32=1to switch to laser mode. Send$32=0to return to spindle mode. -
Install LightBurn (recommended). LightBurn is the standard software for laser engraving and cutting from a computer. It imports images and vectors, generates the engraving raster or vector cut G-code, and sends it to GRBL.
-
Focus the laser. Most modules include a focus tool or instructions for setting focal distance. Focus critically affects engraving quality.
-
Calibrate with a test burn. Run a power-speed grid on scrap wood to find your optimal settings for each material.
Safety requirements
Diode lasers at 10W to 40W optical output are a serious eye hazard and a fire hazard. These are not optional safety measures:
- Laser safety glasses rated for the specific wavelength (typically 440nm to 445nm for blue diode lasers). Not tinted sunglasses. Rated optical density at the operating wavelength.
- Fume extraction. Wood laser engraving produces carcinogenic smoke. An activated carbon filter extractor is required for any enclosed space.
- Fire watch. Never leave a laser running unattended. Keep a fire extinguisher within reach.
- Enclosure. At 20W and above, a physical enclosure that blocks the beam is the safe setup.
LightBurn vs. LaserGRBL: which software to use
LightBurn is the industry standard for laser work on GRBL machines. It handles photo engraving, vector cutting, text, and multi-layer jobs in one interface, runs on Windows and Mac, and costs a one-time license fee.
LaserGRBL is a free Windows-only alternative. It handles basic engraving jobs well but has a steeper learning curve for photo work and lacks LightBurn’s vector cutting workflow.
For most users adding a laser to a CNC router, LightBurn is worth the cost.
FAQ
Can I add a laser to any CNC router? You can add a diode laser module to any CNC router that runs GRBL and exposes a PWM spindle output pin. Confirm the pin is accessible and that a mounting bracket is available for your machine’s carriage.
What GRBL setting do I change for laser mode?
Send $32=1 to enable laser mode (beam fires only while moving, avoids burn dots at zero speed). Send $32=0 to return to spindle mode.
Do I need LightBurn? Not strictly, but it is the easiest and most capable software for laser work from a GRBL machine. LaserGRBL is a free alternative for Windows users.
What laser power do I need for wood engraving? 5W to 10W is adequate for engraving wood, leather, and coated surfaces. 20W adds meaningful cutting capability. 40W is the capable end of diode modules for cutting thicker wood.
Can I run the laser and the router on the same machine at the same time? No. The laser module and the router spindle both use the PWM output. You switch between them by changing the physical connection or using a relay, and you change the GRBL mode parameter accordingly.
Is a diode laser dangerous? Yes, at any power level. Eye exposure to an unfiltered beam causes immediate and permanent retina damage. Rated safety glasses are required. Fume extraction is required when engraving wood, leather, or acrylic.
References
- GRBL documentation, Laser Mode: https://github.com/gnea/grbl/wiki/Grbl-v1.1-Laser-Mode
- LightBurn Software documentation: https://docs.lightburnsoftware.com
- xTool, laser module product specifications: https://www.xtool.com