
CNC Router Laser Attachment Guide: Compatibility, Setup, and Upgrade Options
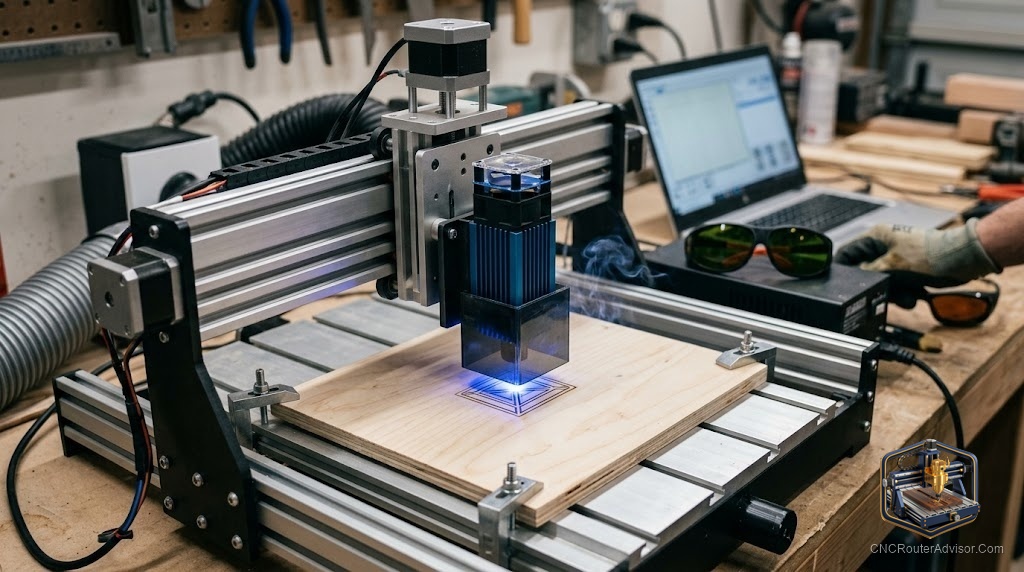
Adding a laser attachment to a CNC router is one of the best-value upgrades available, because it gives you an entirely new capability, laser engraving and thin-material cutting, using the motion system you already own. Instead of buying a separate laser machine, you mount a diode laser module to your router and switch between routing and lasering. But the upgrade is not quite plug-and-play: it depends on your machine’s controller, the right module and mounting, laser-capable software, and, critically, laser safety. Understanding what makes a laser attachment work, and what it demands, turns a router into a genuine two-in-one machine.
A CNC router laser attachment is an add-on diode laser module that mounts to a CNC router and uses the machine’s existing X, Y, and Z motion system to engrave and cut thin materials with a focused laser beam. It requires a compatible controller with a laser output, correct mounting, laser-capable software (LightBurn is the standard), and mandatory laser safety measures.
The short answer on adding a laser: buy the laser module your machine’s manufacturer specifies (or a verified-compatible universal module), confirm your controller has a laser (PWM) output and your software supports laser mode, mount it securely to the Z axis, and put laser safety, glasses, an enclosure, and fume extraction, in place before the first test fire.
How a laser attachment works
A CNC router and a laser share the same core need: precise X/Y motion. That is why the attachment is practical, it reuses your machine’s motion system. The laser module (typically a blue diode, 450nm) mounts to the Z axis and connects to the controller’s laser output. Instead of a spinning bit removing material, a focused beam burns or vaporizes it. You switch “tools”: mount the spindle for routing or the laser for engraving/cutting, and your software sends the appropriate commands (spindle/feed for routing, laser power/speed for lasering).
Compatibility: will it work on your machine?
Controller with a laser output. Your machine needs a GRBL (or compatible) controller with a laser PWM output port. Most hobby and prosumer routers (FoxAlien, Genmitsu, Onefinity, Shapeoko) support this. Check your controller before buying a module.
Manufacturer-matched vs. universal modules. The safest choice is the module your manufacturer specifies, it includes the correct bracket and wiring and is confirmed compatible. FoxAlien, for example, offers 40W (10W optical) and 80W (20W optical) modules matched to specific machines. Universal modules can work but may need an adapter and wiring care.
Mounting. The module must mount to your Z axis or gantry. Manufacturer kits include the right bracket; universal modules may require an adapter.
Software. Routing uses your normal CAM; lasering uses laser software. LightBurn is the industry standard and generates the power/speed commands the controller needs.
Choosing a laser module (power)
Diode modules are rated by electrical and optical power:
- Electrical rating (e.g., 40W, 80W) is the input power.
- Optical rating (e.g., 10W, 20W) is the actual laser output, the number that matters for cutting/engraving capability.
- Higher optical power engraves faster and cuts thicker materials. A 10W-optical module engraves well and cuts thin materials; 20W-optical cuts thicker stock.
Match the module to your intended work and your machine’s specified compatibility.
Setup steps
- Confirm compatibility: controller laser output, mounting, and software support.
- Mount the module securely to the Z axis using the correct bracket.
- Wire it to the controller’s laser output per the manufacturer’s instructions.
- Configure software (LightBurn): set laser mode, power, and speed.
- Set focus: diode lasers use a fixed or adjustable focus at a set height.
- Put safety in place (below) before any test fire.
- Test on scrap to dial in power and speed for your material.
Safety: mandatory, not optional
- Laser safety glasses rated to the module’s wavelength (typically 450nm) whenever the laser is active, diode lasers cause immediate, permanent eye damage.
- Enclosure or interlock to prevent firing when open (routers are open by design).
- Fume extraction: engraving and cutting produce smoke and potentially toxic fumes. Never laser PVC or vinyl (releases chlorine gas). Ventilate or extract.
- Fire risk: a laser burns material, never leave it unattended, and keep a fire extinguisher nearby.
What a laser attachment adds
- Engraving: photos, text, and patterns on wood, leather, acrylic, anodized aluminum, and coated metals.
- Cutting: thin materials, veneer, cardboard, leather, thin acrylic, depending on optical power.
The verdict
A CNC router laser attachment is a high-value upgrade that adds engraving and thin-material cutting using the motion system you already own. The keys are compatibility (a controller with a laser output, correct mounting, and laser-capable software like LightBurn), choosing a module with enough optical power for your work, and, above all, laser safety, glasses, an enclosure, and fume extraction are mandatory. Buy the module your manufacturer specifies where possible, set it up carefully, and test on scrap. Done right, a laser attachment turns one machine into two capabilities in the same footprint.
Three takeaways: a laser attachment reuses your router’s motion system but needs a controller with a laser output, correct mounting, and laser software (LightBurn); choose a module by optical power (the real output) matched to your machine and intended work; and laser safety, wavelength-rated glasses, an enclosure, and fume extraction, is mandatory before any use.
FAQ
Can I add a laser attachment to my CNC router? Usually yes, if your machine has a GRBL-based controller with a laser (PWM) output port. Buy the laser module your manufacturer specifies for your machine, confirm mounting, and use laser-capable software.
What software do I need for a CNC router laser attachment? LightBurn is the industry-standard laser software; it generates the power and speed commands the controller needs. Your normal CAM software still handles routing, LightBurn handles the laser side.
What laser power do I need for a CNC router attachment? Go by optical power (the real output), not electrical rating. A 10W-optical module engraves well and cuts thin materials; 20W-optical cuts thicker stock. Match the module to your work and machine compatibility.
What can a CNC router laser attachment cut and engrave? Engraving on wood, leather, acrylic, anodized aluminum, and coated metals; cutting thin materials like veneer, cardboard, leather, and thin acrylic, depending on the module’s optical power.
Do I need safety equipment for a laser attachment? Yes, mandatory. Laser safety glasses rated to the module’s wavelength (typically 450nm), an enclosure or interlock, and fume extraction. Never laser PVC or vinyl, which releases toxic chlorine gas.
How do I mount a laser module to my router? Use the bracket included with a manufacturer-matched module, which mounts to the Z axis. Universal modules may need an adapter. Mount it securely so it stays aligned and focused during use.
Can the laser and spindle run at the same time? No. They are separate operations. You route with the spindle and engrave/cut with the laser, switching modes and usually physically swapping or selecting the active tool between jobs.
References
- FoxAlien, 40W and 80W Laser Module Kits for CNC Routers (compatibility): https://www.foxalien.com/collections/laser-module
- FoxAlien Blog, Connecting a Laser Module to a CNC Router: https://www.foxalien.com/blogs/news/how-to-connect-the-foxalien-40w-laser-on-cnc-router-4040-xe-masuter-and-3018-se
- LightBurn Software, Laser Control Software (industry standard): https://lightburnsoftware.com/
- Carbide 3D, Adding a Laser to a Shapeoko (compatibility and safety): https://carbide3d.com/
- OSHA / Laser Institute, Laser Safety Guidance (eye protection, wavelength): https://www.lia.org/resources/laser-safety-information