
CNC Router Laser Guide: Compatibility, Setup, and Upgrade Options
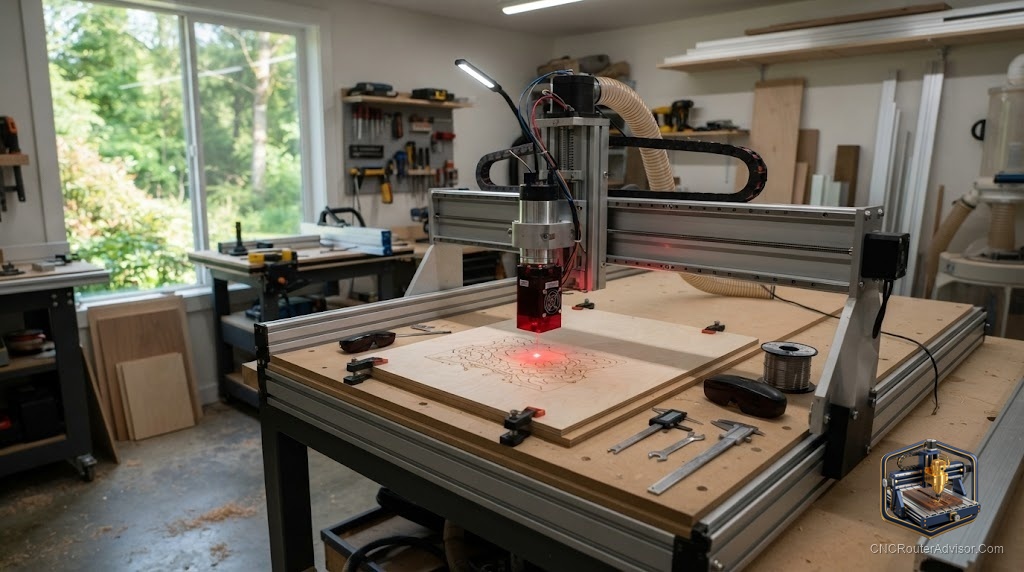
There is a clever upgrade that doubles what a CNC router can do, and a lot of owners never realize it is available to them. Because a laser and a router both move a tool over a work area on precise motorized axes, many machines can swap the spinning bit for a laser module and suddenly gain the ability to engrave, mark, and cut in a completely different way. It is one of the best value additions in the hobby, if your machine supports it.
A CNC router laser is a laser module added to a CNC router so the same machine can both cut with a spinning bit and engrave or cut with a laser beam. The router’s existing motion system moves the laser over the work, letting you burn detailed engravings, mark materials, and cut thin stock without a dedicated laser machine. The key questions are whether your machine supports a laser, how to set it up safely, and what the laser can and cannot do compared to the router.
Short answer: many CNC routers can accept a bolt-on laser module if the controller supports laser control and the frame can mount it. A laser adds fine engraving, marking, and thin-material cutting, while the router still handles carving and deep cuts. Confirm controller compatibility and mounting first, and treat laser safety, eye protection, ventilation, and fire watch, as non-negotiable.
How a router and laser share a machine
Both tools rely on the same thing: a motion system that moves a tool precisely over a work area along X, Y, and sometimes Z. A router spins a bit to remove material; a laser fires a focused beam to burn, vaporize, or mark it. Because the motion platform is shared, adding a laser module often means mounting the module, connecting it to the controller, and using software that can drive it. The machine’s frame, rails, and motors do double duty.
Compatibility: can your machine take a laser
Before buying a module, confirm three things:
- Controller support. The controller must be able to drive a laser, controlling its power output, ideally with a dedicated laser mode. Many GRBL-based boards support this, but confirm yours does.
- Mounting. The laser module needs a secure mounting point near the spindle or router, at a height that lets it focus on the work.
- Power and wiring. The module needs an appropriate power connection and a way to receive on/off and power signals from the controller.
Some machines are sold laser-ready or offer official laser kits, which removes the guesswork. Others need an aftermarket module and some wiring.
What a laser adds
A laser complements the router rather than replacing it:
- Fine engraving of detailed images, text, and photos on wood, leather, and other surfaces, at detail a bit cannot match.
- Marking logos, serial numbers, and decoration on many materials.
- Cutting thin materials like thin plywood, paper, cardstock, leather, and some plastics.
- No tool contact, so delicate materials are not pushed or chipped by a bit.
What it does not do: a hobby-class laser will not cut thick wood or metal the way the router removes material, and it will not carve 3D relief. The router remains the tool for deep cutting and carving.
Setup and workflow
- Mount and focus the module at the correct distance for a sharp, focused spot.
- Enable laser mode in your controller and use software that supports laser toolpaths and image engraving.
- Set power and speed for the material, running tests on scrap since laser settings differ entirely from router feeds and speeds.
- Swap deliberately. When changing between router and laser, re-zero and confirm which tool is active to avoid mistakes.
Safety: the non-negotiable part
Lasers demand respect. Always:
- Wear laser safety glasses rated for your module’s wavelength. Eye damage is instant and permanent.
- Ventilate. Burning material produces smoke and fumes that must be extracted.
- Never leave it running unattended. Laser cutting and engraving is a fire risk; keep a fire watch and an extinguisher nearby.
- Protect the surroundings and skin from the beam and reflections.
Treat these as mandatory, not optional.
The bottom line
Adding a laser to a CNC router is one of the highest-value upgrades available, turning one machine into two by sharing its motion system. Confirm your controller supports laser control and that you can mount the module, then enjoy fine engraving, marking, and thin-material cutting alongside the router’s carving and deep cuts. Just never cut corners on safety, proper eye protection, ventilation, and a fire watch are the price of admission. Done right, a router-laser combo hugely expands what you can make.
FAQ
Can I add a laser to my CNC router? Often yes, if the controller supports laser power control and you can mount the module securely. Some machines are sold laser-ready or offer kits.
What can a laser do that a router cannot? Fine engraving of images and photos, detailed marking, and cutting thin materials without tool contact, at detail a spinning bit cannot match.
Can a laser cut thick wood or metal? Not at hobby power levels. The router remains the tool for deep cutting and carving; the laser handles engraving and thin materials.
What controller do I need for a laser? One that can control laser power output, ideally with a dedicated laser mode. Many GRBL-based boards support this, but confirm yours does.
Is a router laser safe? Only with proper precautions: wavelength-rated safety glasses, ventilation for smoke and fumes, never running unattended, and a fire watch.
Do I need different software for the laser? Yes. You need software that supports laser toolpaths and image engraving, with power and speed settings tuned per material via test cuts.
How do I focus the laser? Mount it at the correct focal distance for a sharp, small spot, following the module’s guidance, and test on scrap before real work.
References
- CNCRouterInfo, how to choose a CNC router: https://cncrouterinfo.com/guides/how-to-choose-a-cnc-router/
- CNC Dad, best CNC router for beginners: https://www.cnc-dad.com/blog/best-cnc-router-for-beginners/