
4-Axis CNC Router DIY: Build Paths, Parts, and What to Expect
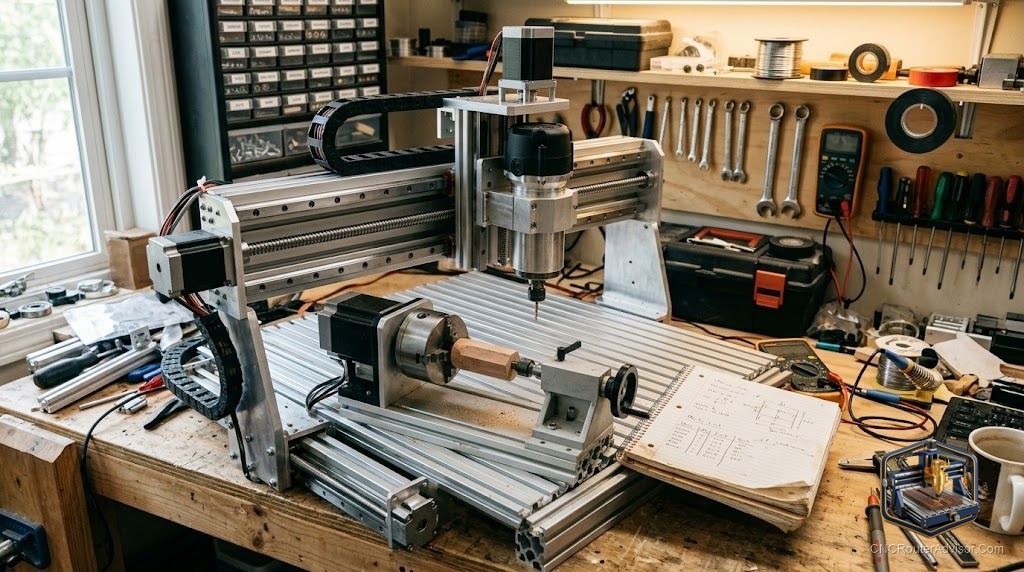
Adding a fourth axis to a 3-axis CNC router is the project that separates the experimenters from the people who want a working production machine. Done well, it opens up cylindrical carving, wood turning by CNC, and wrapped surface designs. Done poorly, it produces a machine that nominally has four axes but delivers three-axis quality on four-axis jobs because the rotary chuck alignment is wrong or the controller doesn’t actually drive four axes simultaneously.
A 4-axis CNC router DIY means building or modifying a CNC router to add a rotary A axis to the standard X, Y, and Z motion. The fourth axis holds a cylindrical workpiece and rotates it synchronized with the other axes for circumferential carving.
The direct answer: the two most practical approaches are (1) adding a rotary axis accessory to an existing machine (Sienci Vortex, third-party rotary chucks for Shapeoko) or (2) building a complete 4-axis machine from scratch using a GRBL or Mach3/4 controller with a stepper-driven rotary axis. The accessory approach is faster and more reliable for most users than a full custom build.
Approach 1: Add Rotary to an Existing Machine
Sienci LongMill MK2 + Vortex Rotary: Sienci’s Vortex accessory is designed specifically for the LongMill. It mounts on the Y axis, provides a NEMA 23-driven chuck and tailstock, and integrates with gSender’s built-in 4-axis support. This is the most plug-and-play 4th-axis experience available in the hobbyist category.
Shapeoko 4th-axis add-ons: Several third-party rotary axis units fit the Shapeoko table. Integration with Carbide Motion is more limited than gSender’s native 4-axis support; some users run an alternate controller for 4-axis jobs.
Concrete flaw: These accessories convert the A axis into a replacement for one linear axis (usually Y), not a true simultaneous 4-axis addition. The machine carves the cylinder by treating rotation as the new Y axis. True 4+1 machining (where you can both rotate the workpiece and move it along Y simultaneously) requires more complex controller setup.
Approach 2: Full 4-Axis DIY Build
A complete 4-axis build uses a GRBL controller with 4-axis firmware (grblHAL), or Mach3/4, with a stepper or servo-driven rotary chuck.
Required components:
- Rotary chuck with NEMA 23 motor drive
- 4-axis-capable controller (grblHAL, Mach3, Mach4, LinuxCNC)
- Tailstock for long workpieces
- CAM software with rotary toolpath support (Aspire, Fusion 360)
Concrete flaw: grblHAL’s 4-axis support requires more configuration than standard GRBL. Mach3/4 has a learning curve. This is a project for users comfortable with firmware configuration and G-code.
Verdict
For most users, adding a purpose-designed rotary accessory to an existing machine (Sienci Vortex or equivalent) is the most reliable path to 4-axis capability. Full custom builds produce more flexible machines but require significantly more technical work.
- Sienci Vortex + LongMill MK2: most plug-and-play 4th-axis solution in hobbyist CNC
- Full DIY: more flexibility, requires grblHAL or Mach4 and more configuration
- CAM software must support rotary toolpaths: Aspire and Fusion 360 both do
- Verify controller 4-axis support before purchasing hardware
FAQ
Can I add a 4th axis to any CNC router? Most 3-axis machines can accept a rotary axis if the controller supports 4-axis output. Check your controller before purchasing hardware.
What controller supports 4-axis CNC routing? grblHAL, Mach3, Mach4, and LinuxCNC all support 4-axis operation. Standard GRBL does not natively support simultaneous 4-axis motion.
What CAM software generates 4-axis rotary toolpaths? Vectric Aspire and Fusion 360 both generate rotary toolpaths for CNC 4-axis work.
References
- Sienci Vortex: sienci.com/vortex
- grblHAL: github.com/grblHAL
- Vectric Aspire rotary toolpaths: vectric.com