
Router CNC Table Guide: Setting Up a Proper Work Surface for Cleaner Cuts
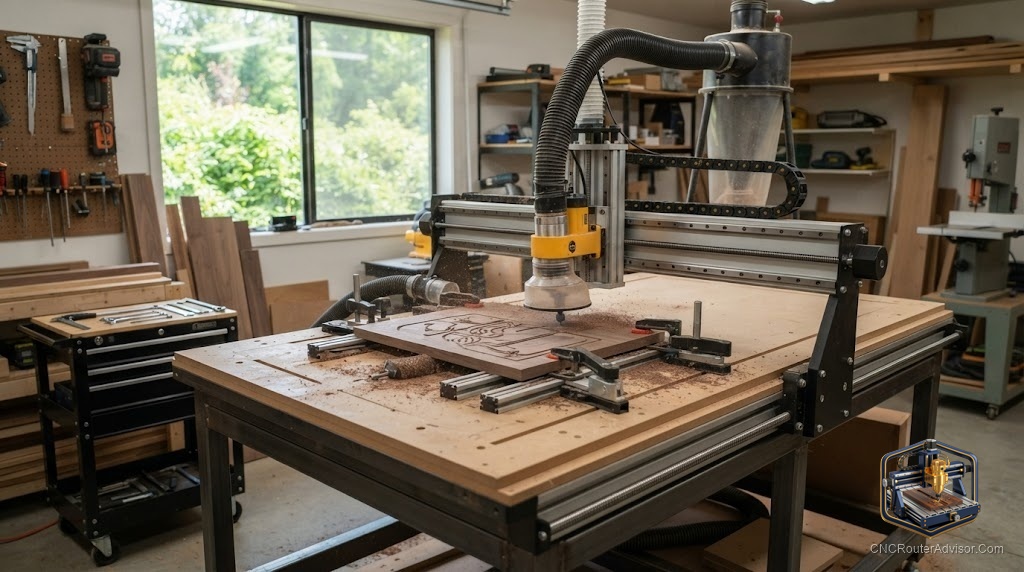
The CNC router is the machine people talk about. The table it sits on and the surface it cuts against are the parts people underestimate until a warped spoilboard ruins a full sheet of expensive plywood, or a part shifts mid-cut because the workholding was improvised. The router CNC table, meaning the full setup of the machine’s work surface, spoilboard, workholding, and dust extraction, is what determines whether the machine you paid for actually performs the way you expected. Get this right and every cut benefits. Get it wrong and you spend your time chasing inconsistency that has nothing to do with the machine.
A router CNC table is the complete work surface system of a CNC routing setup: the machine bed, the spoilboard layer on top of it, the workholding that secures material, and the dust extraction that keeps the cut clear and the shop breathable. These elements work together, and treating any one of them as optional is what causes most of the consistent, baffling quality problems new CNC owners experience.
The short version: surface your spoilboard flat before you cut on it, use workholding that actually prevents movement (not tape that hopes for the best), connect real dust extraction, and set Z-zero from the top of the actual material with a probe. Do those four things and the machine’s mechanical performance gets to show up without being masked by setup errors.
The spoilboard: the most important surface you never look at
The spoilboard is the sacrificial material that sits on top of the machine bed and takes the tip of the cut when you profile or cut-through. It sounds unglamorous, and it is. It is also one of the most important parts of your setup, because a flat spoilboard is what ensures your material lies flat against the bed, and a material that lies flat gets cut to consistent depth across the whole sheet.
Spoilboards warp, wear unevenly, and collect track marks over time. The fix is surfacing: running a spoilboard surfacing bit across the full bed at a shallow depth to skim the surface flat. This should be part of your regular maintenance, not a one-time setup step. The Genmitsu spoilboard surfacing bit covers this cleanly for desktop and prosumer machines, leaving a flat, consistent surface that every future job benefits from. When the spoilboard is too deeply tracked to surface flat anymore, replace it and start fresh, since spoilboard material is cheap relative to the work you put on it.
MDF is the classic spoilboard material because it is flat, cheap, and uniform. T-slot aluminum is a better structural bed but a worse sacrificial layer, so most setups use T-slot or the metal bed for structure and an MDF layer on top as the spoilboard proper.
Workholding: the step that decides whether your part survives
Cutting force is higher than it looks. The bit exerts lateral force on the material during every pass, and material that is only “probably” held down will eventually move. The cost is always a ruined part, a broken bit, and sometimes a safety incident. Workholding is the skill that prevents all of that.
Four methods cover most situations.
Clamps are the classic solution: fast, reusable, strong, and fine as long as they do not intrude into the toolpath. Step clamps and low-profile clamps are designed for CNC work and keep the clamp body away from the cut. A good clamping kit is a shop essential. The honest limit: clamps cannot hold material at its edges, so any cut that goes to the edge of the sheet needs a different approach.
Double-sided tape with superglue is fast and works well for smaller parts. The combination of tape and a few dots of CA glue creates a strong, low-profile hold that does not interfere with the toolpath. It is the go-to for irregular shapes and flat panels where clamps would get in the way.
Screws into a sacrificial layer are the most secure for parts with irregular profiles. You screw through your spoilboard into a sublayer, position the workpiece and screw through it, and profile around the screws. It is slower to set up and you plan the layout to avoid the fasteners, but nothing else holds as well.
Vacuum tables are the production-shop standard for sheet goods. The machine pulls the workpiece down uniformly across its whole surface, making fixturing fast and consistent. They are expensive and add complexity, but for anyone running high volumes of sheet work, the time savings justify the investment.
Dust extraction: the part that protects everything
A CNC router without dust extraction makes a mess that degrades cut quality and your lungs simultaneously. Chips in the cut path reduce finish quality by letting the bit re-cut its own waste. Fine dust in the air is a health hazard, especially with MDF and hardwoods. And chips accumulating on the table reduce how flat and secure your next workpiece sits.
The minimum viable setup is a shop vacuum connected to a dust shoe on the spindle. The dust shoe rides with the cutter and captures chips and dust at the source, which is far more effective than a vacuum hose pointed vaguely at the machine. For higher volume use, a proper dust collector handles the volume better than a shop vacuum and does not lose suction as the canister fills.
Chip evacuation on deeper cuts sometimes needs an air blast or a cold air gun to clear the slot, because a deep pocket accumulates chips faster than a dust shoe can remove them. Even a squeeze puffer between passes helps on hobby machines.
The Z-probe: the setup tool that pays back on every job
Setting Z-zero accurately from the top of the material is what determines whether your cuts are the correct depth. Setting it by eye, by paper-slip method, or by feel introduces errors that compound with material thickness variation. A touch probe sets Z automatically in seconds, touching the material surface and telling the machine exactly where zero is. On machines that include one, use it every time. On machines that do not, it is worth adding, because the time it saves and the errors it prevents across hundreds of jobs make it one of the best return-on-investment additions to a CNC router table setup.
Our guide on how to choose a CNC router includes a section on setup accessories worth prioritizing for different use cases.
The takeaway: a CNC router’s performance is the floor set by the machine and the ceiling set by the table setup around it. Invest in a flat spoilboard, real workholding, proper dust extraction, and a Z-probe, and the machine you have performs like a machine you paid more for.
Frequently asked questions
What is a CNC router spoilboard? A sacrificial material layer on the machine bed that protects the bed and takes the tip of through-cuts. Keeping it flat and properly surfaced is one of the most important ongoing maintenance tasks.
How often should I surface my spoilboard? Whenever it shows uneven wear, track marks, or warping that affects how material sits against it. For regular use, every few weeks to monthly is common.
What is the best workholding for a CNC router? It depends on the work: clamps for sheet goods with clear edge margins, tape-and-CA for smaller irregular parts, screws for irregular-profile cuts, and vacuum tables for high-volume sheet work.
Do I need a dust collector or will a shop vacuum work? A shop vacuum connected to a dust shoe works well for lighter use. A dedicated dust collector handles higher volumes without losing suction and is the better choice for regular production use.
What is a Z-probe and why does it matter? A touch probe that automatically sets the Z-axis zero from the top of the material, replacing manual Z-setting methods that introduce error. It pays back in accuracy and time on every job.
What material should a spoilboard be made from? MDF is the classic choice: flat, cheap, and consistent. Replace it when it is too worn to surface flat again.
References
- WorkshopCalc, “Best CNC Routers: Workholding and Setup” — https://workshopcalc.com/guides/best-cnc-routers
- CNC Dad, “CNC Router Setup and Table Guide” — https://www.cnc-dad.com/blog/best-cnc-router-for-beginners/
- Carbide 3D, “Workholding Methods for CNC” — https://docs.carbide3d.com/tutorials/workholding/