
Laser Attachment for CNC Router: How to Add Engraving to a Machine You Already Own
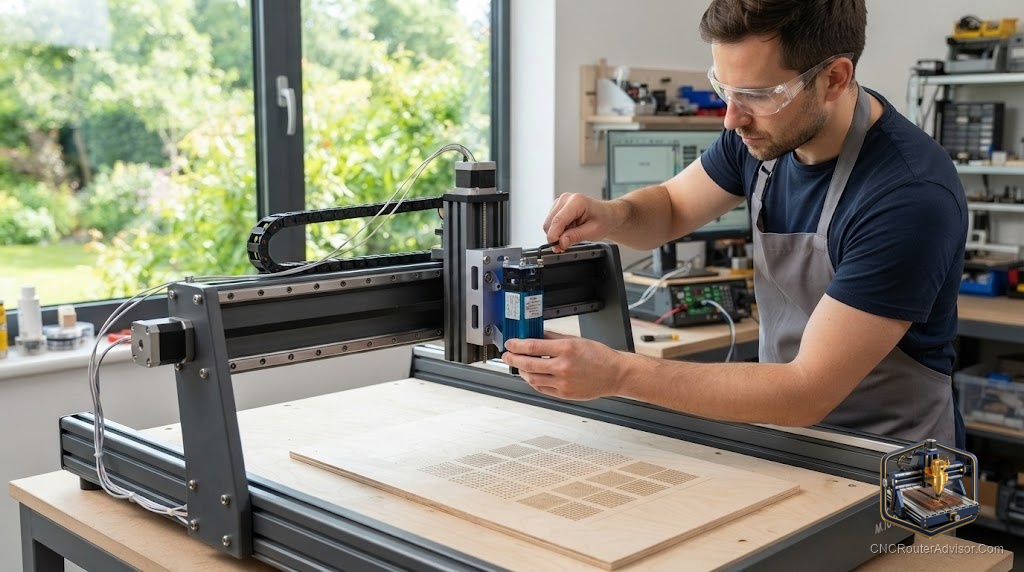
The smartest upgrade a CNC router owner can make is often not a bigger machine, it is a small box that bolts where the router sits. A laser attachment turns the machine you already own into a two-in-one tool: carve in the morning, engrave and cut thin material in the afternoon, all on the same rigid frame and motion system you already paid for. It is one of the best value upgrades in the hobby, and it is also one where a little knowledge saves you from buying the wrong module for your machine.
A laser attachment for a CNC router is a diode laser module that mounts in place of, or alongside, the spindle and uses the machine’s existing motion system to engrave and cut. Because your router already moves precisely along the X, Y, and Z axes, adding a laser mostly means mounting the module and feeding it the right control signal, which makes it a far cheaper path to laser work than buying a standalone laser machine.
The short answer to doing it well: match the laser’s optical power to the work you want (a few watts for engraving, 10 watts and up for cutting thin wood and dark acrylic), confirm the module can connect to your controller, and never skip the safety gear, because a diode laser strong enough to cut is strong enough to hurt your eyes instantly. Get those three right and a laser attachment transforms what your CNC router can make.
Why adding a laser to a CNC router makes so much sense
The economics are the whole story. A standalone laser machine duplicates a frame, a motion system, and a controller you already own in your CNC router. A laser attachment skips all of that and adds only the part that is actually different, the laser module itself. You get engraving and light cutting for a fraction of the cost of a second machine, and you keep one footprint in the shop instead of two.
The capability jump is real too. A laser does things a spinning bit cannot: fine photo-style engraving, crisp text, intricate detail in a single pass, and clean cuts in thin wood, leather, and dark acrylic with no tool marks. Pairing carving and lasering on one machine means you can, say, carve a sign and then laser fine detail or a maker’s mark into it without re-fixturing on a different tool.
Match the power to the job, not the marketing
Here is where buyers go wrong, so read carefully. Laser modules are sold with two very different numbers: the headline “wattage” (input power) and the honest number, optical output power. Optical output is what actually does the work, so judge modules by that.
For engraving wood, leather, anodized aluminum, and slate, a module in the roughly 5 watt optical range is plenty and gives fine detail. The Genmitsu CFL55 5.5W laser module is a sensible engraving-focused choice, with a compressed-spot design aimed at detail work.
For cutting thin plywood, dark acrylic, and thicker engraving passes, step up to around 10 watts optical or more. The LASER TREE 10W optical module is built around real optical output rather than inflated input figures, which is exactly what you want when cutting is the goal.
For owners who want to push into thicker single-pass cuts, high-output modules exist, such as the FoxAlien 40W module, where the higher optical power cuts thicker stock and cuts faster, at the cost of more heat and a bigger price. Be honest with yourself about whether you need cutting power or just engraving, because paying for 40 watts to engrave coasters is wasted money, and buying 5 watts to cut plywood is wasted patience.
The compatibility check people forget
A laser module is useless if your controller cannot switch it correctly, so confirm this before buying. Most diode modules expect a PWM signal (the same kind of variable control that would drive a spindle’s speed), and your machine needs a spare output that can provide it. Many GRBL-based controllers handle this well, but not all wiring is identical, so check your board’s documentation and the module’s connector before ordering. Also confirm the mount: modules ship with brackets for common spindle diameters, and you want one that fits your machine without a fabrication project.
A second practical note: your CAM workflow changes. Laser work uses a laser mode in your control software so the beam turns off during rapid moves and modulates with speed, which prevents scorching. It is a settings change, not a hardware one, but skipping it produces ugly results.
Safety is not optional here
This is the part no honest guide can soften. A diode laser powerful enough to cut can cause permanent eye damage from a reflection you never see coming, so laser-rated safety glasses matched to the module’s wavelength are mandatory, not a nice-to-have. Add proper fume extraction, because lasering wood, leather, and especially acrylic releases smoke and fumes you should not breathe, and never leave a running laser unattended, because scorching and fire are real risks. Treat the laser with more caution than the spinning bit, not less.
Who should add a laser, and who should not
Add a laser attachment if you already own a CNC router, want engraving or light cutting, and would rather upgrade one machine than buy two. Skip it if your work is purely heavy carving, or if you want high-volume, thick-material laser cutting, because at that point a dedicated CO2 or high-power laser machine will outperform a diode add-on. For most hobbyists and small shops, though, a diode attachment is the sweet spot of cost and capability.
If you are still choosing the underlying machine, our guide on how to choose a CNC router helps pick a base that will take a laser upgrade cleanly.
The takeaway: a laser attachment is a rare upgrade that adds a whole second skill to a machine you already trust. Buy by optical output, confirm your controller can drive it, protect your eyes and lungs, and your CNC router quietly doubles as a laser engraver for a fraction of the cost of a second machine.
Frequently asked questions
Can any CNC router take a laser attachment? Most can, as long as the controller can provide a PWM (variable) output to drive the module and you can mount the module to the spindle carriage. Check your board’s documentation before buying.
How much laser power do I need? Around 5 watts optical for detailed engraving, and roughly 10 watts optical or more for cutting thin plywood and dark acrylic. Judge modules by optical output, not headline input wattage.
Is a laser attachment as good as a dedicated laser machine? For engraving and light cutting, it is excellent and far cheaper. For high-volume or thick-material cutting, a dedicated CO2 or high-power laser will outperform a diode add-on.
What safety gear do I need? Laser-rated glasses matched to the module’s wavelength, fume extraction, and never running the laser unattended. Eye protection is mandatory, not optional.
Do I need special software? You use your control software’s laser mode so the beam turns off during rapid moves and modulates with speed. It is a settings change, not new hardware.
Can it engrave metal? Diode lasers can mark anodized aluminum and coated metals and darken bare steel with the right settings, but they do not cut metal. That is a job for other tools.
References
- OptLasers, “Adding a Laser to a CNC Router or Mill” - https://optlasers.com/laser-heads-for-engraving/laser-attachment-for-cnc
- Endurance Lasers, “How to Attach a Laser to a CNC Machine” - https://endurancelasers.com/how-to-attach-a-laser-to-a-cnc-machine/
- All3DP, “Diode Laser Power: Optical vs Input Watts Explained” - https://all3dp.com/2/diode-laser-power-explained/