
CNC Router for Acrylic: Bits, Speeds, and the Cuts That Actually Work
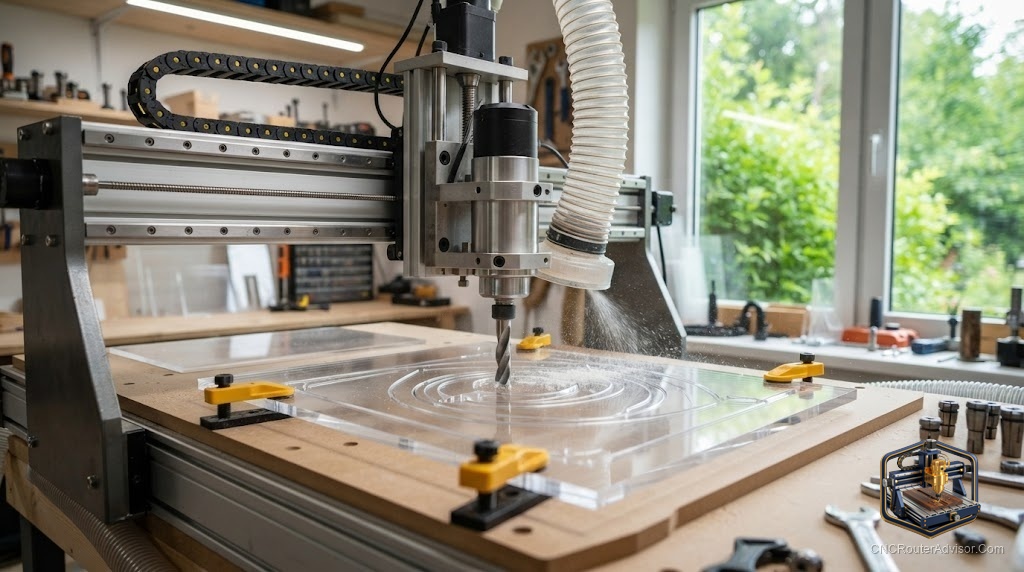
Acrylic is one of those materials that looks easier than it is. It is smooth, clean, and machines into crisp edges that wood cannot match, which is why it ends up in signs, display pieces, light-diffusing panels, enclosures, and jewelry. It also melts instead of chips if you get the settings wrong, and a melted acrylic cut is a ruined part that sticks to the bit and requires far more cleanup than the five minutes you saved by rushing. The good news is that cutting acrylic cleanly is straightforward once you understand what the material wants from your machine.
Cutting acrylic on a CNC router, known in Spanish as “router CNC para acrilico,” means running a spinning bit through a thermoplastic sheet to cut profiles, pockets, and engravings. Because acrylic is a plastic rather than wood, the main risk is heat: too slow a feed and the bit melts the material rather than cutting it, fusing chips back into the kerf. The solution is a bit designed for plastics and a chip load fast enough to eject warm chips before they re-weld.
The short version: use a single-flute or O-flute carbide bit designed for plastics, run spindle speed lower than you would for wood, push feed rate high enough to cut rather than rub, take full-depth passes rather than multiple shallow ones on most transparent acrylics, and keep the cut cool. Those four adjustments transform a frustrating material into a satisfying one.
Why acrylic needs its own settings and bit
Acrylic’s sensitivity to heat is the whole story. Wood has a high heat tolerance and absorbs some of the cutting energy, but acrylic has a relatively low melting point and a low thermal conductivity, so heat builds up at the cut edge rather than dissipating. A bit that moves too slowly spends too long in contact with the material, and the friction melts acrylic rather than chipping it. You end up with a fused, cloudy edge instead of a clean one.
This is why a bit designed for wood is often the wrong choice for acrylic. Standard spiral bits have multiple flutes, which looks like more cutting edges but actually means less space between those edges to eject chips. On acrylic, chip evacuation is more important than cutting efficiency, because a chip that stays in the kerf re-melts and welds back into the edge. Single-flute and O-flute bits (sometimes called upcut O-flute or spiral O-flute) have one cutting edge and a large chip-clearance groove, which ejects each chip cleanly before the next pass. They are specifically designed for plastics and make a dramatic difference.
The settings that prevent melting
The operating principle for acrylic is: fast feed, moderate spindle speed, full depth of cut in one pass for most sheet thicknesses.
Feed rate: go faster than you think. The feed rate needs to be high enough that the bit is actively cutting and ejecting chips, not dwelling in the material. For a 1/8 inch O-flute at typical hobby spindle speeds, starting at 1,000 to 1,500 mm per minute is a reasonable entry point, and many machinists run faster. Compare this to softer woods where you might go slower, and you see the counter-intuitive nature of acrylic: faster feed produces cleaner results.
Spindle speed: lower than wood. Most desktop CNC router operators run spindle speed for acrylic in the 8,000 to 18,000 RPM range, lower than they would for hardwood, because slower rotation gives each chip more time to clear before the next contact. If your trim router only goes above 16,000 RPM, you compensate by running the highest feed rate your machine can manage reliably.
Depth of cut: usually full depth in one pass. For most sheet acrylics up to about 6mm thick, cutting full depth in a single pass keeps the bit in contact with cool material and evacuates chips better than multiple shallow passes. Multiple passes mean the bit re-enters already-machined walls, which can melt them. For thicker stock, two passes is usually still better than four.
Chip clearing: keep it moving. If you stop mid-cut, the bit melts the material. Use an air blast or compressed air to clear chips, especially in deep pockets. Even blowing with a puffer between passes helps on hobbyist machines without air blasts.
Workholding: the problem unique to acrylic
Acrylic sheets come with a protective paper or plastic film covering, and the question is always whether to cut with it on or off. Cutting with the masking on protects the surface from scratches during cutting, which is usually a good idea for the face that will be visible. The masking also provides a surface for workholding tape without touching the acrylic. Remove the masking after cutting, not before.
For holding the sheet to the spoilboard, double-sided tape works well on acrylic because you cannot use through-screws (they leave holes). Keep downward pressure even, especially toward the edges, because acrylic can lift during the final tab-cut or profile pass. Tabs are worth using on profiling operations to prevent finished pieces from shifting and catching the bit on the last pass.
What acrylic makes particularly well
Acrylic shines on a CNC router for display signs (the machined edges light up beautifully when edge-lit with LEDs), awards and trophies, light diffusing panels, name badges, enclosures for electronics, and any project where a clean, professional-looking plastic edge matters. Engraved acrylic, especially cast acrylic, takes detail at a level that wood engraving rarely matches. The combination of a CNC router for profiling and a laser engraver for surface detail is a popular pairing for acrylic sign work.
For tooling suited to acrylic and other plastics, a router bit essential kit covers starter profiles, though investing in a dedicated O-flute plastic bit quickly pays for itself in scrap saved. The SpeTool down-cut bit also works on acrylic for surface engraving where a clean top face is the priority and depth is shallow, keeping speeds and feeds properly managed.
The honest note for beginners: your first acrylic cuts will probably show some melting, and that is fine. It is the material’s way of telling you to increase feed rate or switch to an O-flute bit. Make the adjustment, run a test piece, and you will find the window where acrylic cuts cleanly and rewardingly.
Frequently asked questions
What bit should I use to cut acrylic on a CNC router? A single-flute or O-flute carbide bit designed for plastics. It has one cutting edge and a large chip-clearance groove to eject chips before they re-melt. Standard multi-flute wood bits work but produce lower quality results.
Why does my acrylic melt instead of cutting? The feed rate is too slow relative to the spindle speed, so the bit dwells in the material and generates heat. Increase feed rate, lower spindle speed if possible, and switch to an O-flute plastic bit.
Should I cut acrylic in one pass or multiple passes? For most sheet thicknesses up to about 6 mm, full depth in one pass gives better results. Multiple shallow passes let the bit re-enter cut walls and melt them.
Do I need a coolant or air blast? An air blast helps clear chips and keep the cut cool, but many hobbyist operators cut acrylic dry with good results by using the right bit and fast feed rates.
What spindle speed for acrylic? Typically 8,000 to 18,000 RPM, lower than hardwood. High spindle speed combined with low feed rate is the fastest way to melt acrylic.
Can a CNC router engrave acrylic? Yes. Cast acrylic takes fine engraving detail beautifully, especially with a small V-bit or ball-nose bit at appropriate speeds. Down-cut geometry gives a clean top face on shallow engraving.
References
- Carbide 3D Community, “Cutting Acrylic: Feeds, Speeds, and Bit Selection” — https://community.carbide3d.com/t/acrylic-cutting-guide/
- CNCCookbook, “Plastic Machining: Acrylic and Polycarbonate” — https://www.cnccookbook.com/machining-plastics/
- Inventables, “How to Cut Acrylic with a CNC Router” — https://www.inventables.com/technologies/cnc-routing-acrylic