
CNC Router Cutting Plywood: Bits, Settings, and Clean-Cut Techniques
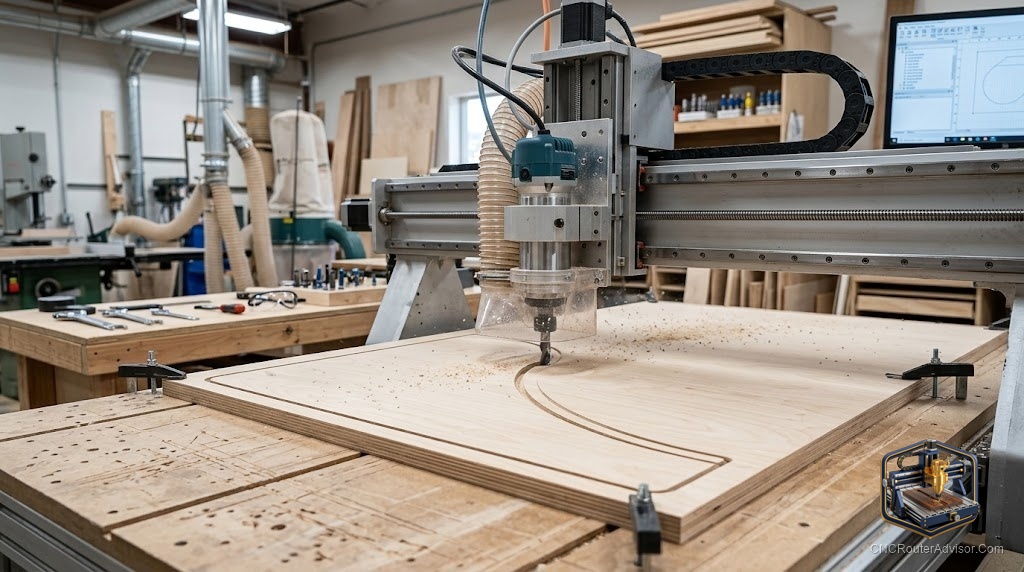
Plywood is the workhorse material of CNC routing, affordable, stable, strong, and available everywhere, and it is what most people cut most often. But plywood also has a reputation for fighting back: fuzzy top edges, blown-out bottom faces, tear-out on the veneer, and glue lines that dull bits faster than solid wood. The good news is that clean plywood cutting is almost entirely a matter of technique, choosing the right bit, dialing in feeds and speeds, and holding the material properly. Get those right and plywood cuts beautifully; get them wrong and even an expensive machine produces ragged parts.
CNC router cutting plywood is the process of using a CNC router to cut, profile, and pocket plywood sheet stock, which requires attention to bit selection, feeds and speeds, workholding, and chip evacuation to overcome plywood’s tendency to fuzz, tear out, and blow out at the edges. The single most impactful choice is the cutting bit, with a compression bit widely regarded as the best for clean plywood edges.
The short answer on clean plywood cuts: use a compression bit for the cleanest edges on both faces, hold the material flat and secure (vacuum or clamps plus a spoilboard), set feeds and speeds to produce real chips rather than dust, and use tabs and appropriate cut depth to prevent parts from shifting. These four techniques solve almost every plywood cutting problem.
Why plywood is tricky to cut cleanly
Understanding the problems points to the solutions:
- Cross-grain veneers: plywood’s layers alternate grain direction, so an ordinary bit tears out fibers on one face or the other.
- Thin surface veneer: the top and bottom veneers fray easily (fuzz and splintering).
- Glue lines: the adhesive between layers is abrasive and dulls bits faster than solid wood.
- Voids (in cheaper plywood): internal gaps cause inconsistent cuts and blowout.
Bit selection: the biggest factor
Compression bit (the best choice for plywood). A compression bit combines upcut geometry at the tip and downcut geometry above it. The upcut portion pulls the bottom veneer up (clean bottom edge) while the downcut portion pushes the top veneer down (clean top edge), leaving both faces clean. This is the go-to bit for quality plywood cutting.
Downcut bit. Pushes chips down, giving a clean top edge, good when the top face is what shows. The tradeoff is poorer chip evacuation (chips pack in the cut), so use shallower passes.
Upcut bit. Excellent chip evacuation, but tends to fray the top veneer. Fine for hidden edges or when a spoilboard supports the bottom.
Straight bit. General-purpose but more prone to fuzzing than a compression bit on plywood.
Solid carbide is essential, plywood’s glue lines dull HSS quickly.
Feeds, speeds, and depth of cut
- Produce chips, not dust. Too slow a feed (or too high an RPM) causes rubbing, heat, burning, and dulling. The feed should produce visible chips. This proper “chip load” keeps the bit cool and the cut clean.
- Depth of cut per pass. A common starting point is a depth of cut roughly equal to the bit diameter per pass for through-cuts in plywood, adjusted for machine rigidity. Compression bits usually need a first pass deep enough to engage both the up and down cutting zones for the cleanest edge.
- Multiple passes for thicker plywood, reducing load and improving finish.
- Climb vs. conventional milling affects edge quality; test both on your setup for the cleanest result.
Workholding and chip evacuation
- Vacuum hold-down for full sheets keeps material flat and secure without clamps in the toolpath.
- Clamps plus a spoilboard for smaller pieces; a flat spoilboard supports the bottom face and prevents blowout on through-cuts.
- Tabs (holding tabs): small uncut bridges that keep parts attached to the sheet until you remove them by hand, preventing parts from shifting or flying loose at the end of a cut.
- Dust collection / chip evacuation: clears chips so they do not re-cut and mar the surface, and keeps the cut cool.
Step-by-step for clean plywood cuts
- Choose a compression bit sized to your detail and material thickness.
- Secure the sheet flat with vacuum or clamps over a flat spoilboard.
- Set feeds and speeds to produce chips (not dust); consult the bit maker’s chart.
- Set depth of cut per pass appropriate to the bit and machine, ensuring the compression bit’s first pass engages both cutting zones.
- Add tabs to keep parts in place through the final pass.
- Run dust collection to clear chips and keep the cut clean.
- Finish: light sanding removes any minor fuzz; a sharp bit and correct settings should leave little to sand.
The verdict
Cutting plywood cleanly on a CNC router comes down to four things: the right bit (a compression bit for clean edges on both faces), proper feeds and speeds that produce chips rather than dust, solid flat workholding with a supporting spoilboard, and tabs to keep parts in place. Plywood’s cross-grain veneers, thin surface layers, and abrasive glue lines create its challenges, but each is solved by technique, not by spending more on the machine. Use solid carbide, hold the material well, and dial in your chip load, and plywood becomes the reliable, clean-cutting workhorse it should be.
Three takeaways: a compression bit is the single best choice for clean plywood edges on both faces; set feeds and speeds to produce real chips (not dust) to avoid burning and dulling; and secure the material flat with a supporting spoilboard and use tabs to prevent shifting and blowout.
FAQ
What is the best bit for cutting plywood on a CNC router? A compression bit, which combines upcut and downcut geometry to leave clean edges on both the top and bottom faces. Solid carbide is essential because plywood’s glue lines dull bits quickly.
Why does my plywood have fuzzy or torn edges? Usually the wrong bit (an upcut or straight bit frays the top veneer), a dull bit, or incorrect feeds and speeds. Switch to a sharp compression bit and set the feed to produce chips rather than dust.
What feeds and speeds should I use for plywood? Settings that produce visible chips, not dust. Too slow a feed or too high an RPM causes rubbing, heat, burning, and dulling. Follow the bit manufacturer’s chip-load chart for your bit and material thickness.
How deep should each pass be when cutting plywood? A common starting point is a depth of cut roughly equal to the bit diameter per pass, adjusted for machine rigidity. With a compression bit, the first pass should be deep enough to engage both the up and down cutting zones.
How do I stop plywood parts from moving during cutting? Hold the sheet flat with vacuum or clamps over a spoilboard, and add tabs, small uncut bridges that keep parts attached to the sheet until you remove them by hand after the job.
Do I need a spoilboard to cut plywood? It helps significantly. A flat spoilboard supports the bottom face on through-cuts, preventing blowout, and provides a true, flat reference surface. It also protects your machine bed.
Does plywood dull CNC bits faster than solid wood? Yes. The abrasive glue lines between plywood layers wear cutting edges faster than solid wood, which is why solid carbide bits are strongly recommended for plywood.
References
- CNCRouterInfo, CNC Router Bits Explained (compression, upcut, downcut for plywood): https://cncrouterinfo.com/guides/cnc-router-bits/
- Carbide 3D, Understanding End Mills and Feeds & Speeds (chip load basics): https://carbide3d.com/blog/end-mills-explained/
- IDC Woodcraft, Best CNC Bits for Cutting Plywood (compression bit guidance): https://idcwoodcraft.com/pages/cnc-router-bits-guide
- Amana Tool, Compression Spiral Router Bits for Plywood and Laminates: https://www.amanatool.com/router-bits/compression.html
- Onefinity CNC Forum, Workholding and Tabs for Sheet Goods: https://forum.onefinitycnc.com/