
3D CNC Wood Router Guide: Tooling, Speeds, Workholding, and Finish Quality
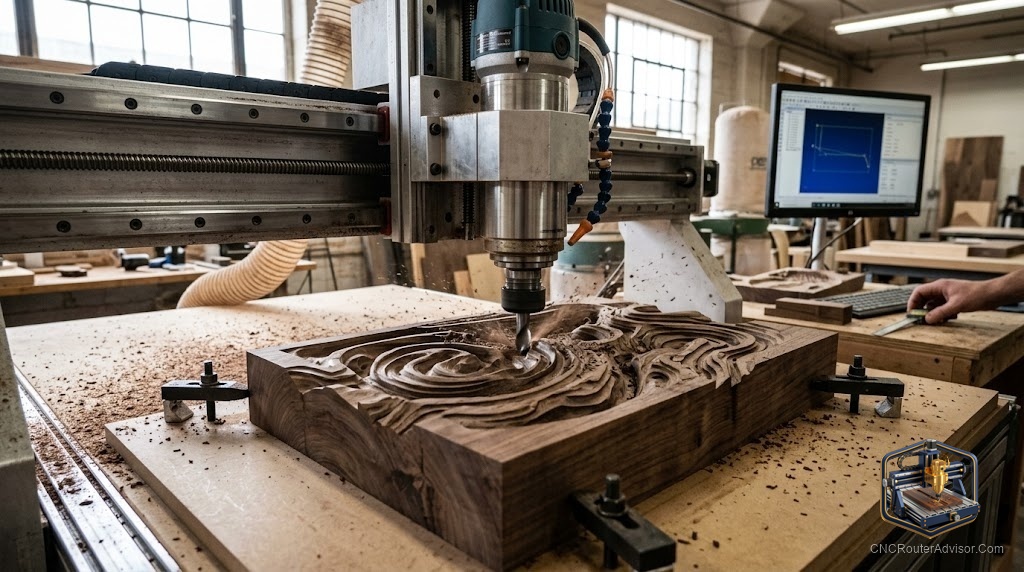
Flat cutting is where most people start with a CNC router. You profile a shape, engrave some letters, and call it a day. Then you see a carved rose, a topographic map, or a decorative panel with real depth and shadow, and the goal changes. That kind of sculpted, dimensional work is 3D carving, and it asks more from your tooling, your settings, and your patience than any flat job ever will.
A 3D CNC wood router is a machine used to carve three-dimensional relief and sculpted shapes in wood, rather than simple flat profiles and engraving. The machine itself is often the same router you already own; what changes is the toolpath strategy, the bits, and the finishing approach. Success comes from a good roughing and finishing workflow more than from any single piece of hardware.
Short answer: any rigid CNC router can do 3D wood carving. What matters is using a two-stage roughing and finishing toolpath, a ball-nose bit for the finishing pass, tight stepover for smooth surfaces, and species selection that carves cleanly. Expect long run times and plan your workholding so the piece never shifts across a multi-hour job.
How 3D carving differs from flat work
Flat cutting removes material to a single depth. 3D carving sculpts a continuously varying surface, which the machine builds up by making many closely spaced passes. That means two things: jobs take much longer, and the bit shape directly determines surface smoothness. A carved surface is really thousands of tiny cuts blended together.
The standard workflow is two stages. A roughing pass uses a larger end mill to clear away the bulk of the waste quickly, leaving a stepped, rough version of the shape. A finishing pass then uses a ball-nose bit to trace the surface in fine lines, producing the smooth final form. Skipping the roughing pass wastes hours and strains the finishing bit.
Tooling
- Ball-nose bits are the heart of 3D carving. Their rounded tip blends adjacent passes into a smooth contour. A larger ball-nose covers ground faster; a smaller one captures fine detail. Many carvers rough with a larger bit and finish detail areas with a small one.
- Upcut or single-flute end mills handle roughing, clearing chips efficiently.
- Tapered ball-nose bits add strength for deep, detailed work and reach into steep areas.
Speeds and stepover
The single biggest lever on finish quality is stepover, the spacing between finishing passes. A tight stepover leaves a glassy surface but takes much longer; a wide stepover is faster but leaves visible ridges. For fine work, a small stepover on the finishing pass is worth the extra time, since it dramatically reduces sanding.
Run feeds and speeds appropriate to the species and bit. Push too hard on a detailed finishing pass and you get chatter and torn grain; go too slow and you burn the wood.
Species and material
Wood choice shapes the result. Tight, even-grained species carve crisp detail: hard maple, cherry, walnut, and basswood are favorites for relief work. Open-grained or soft species like pine can fuzz or tear on fine detail. Plywood and MDF carve predictably and are great for practice, though MDF produces heavy dust. Chip evacuation and dust collection matter over long carves.
Workholding
A 3D carve can run for hours, and any shift ruins the whole piece. Hold the stock securely with clamps outside the carve area, screws into a sacrificial base, or a strong tape-and-glue method for lighter work. Because the machine revisits the surface many times, rock-solid workholding is even more important than in flat cutting.
Finish quality
A well-carved surface with a tight stepover needs only light sanding. Work up through progressively finer grits, following the contours by hand, then finish with oil or a wipe-on coat that pops the depth and grain. The better your finishing toolpath, the less sanding stands between you and a clean result.
The bottom line
3D wood carving is less about the machine and more about the method. Rough with a stout end mill, finish with a ball-nose at a tight stepover, choose a tight-grained species, and lock the workpiece down for the long haul. Do that and a standard rigid router produces sculpted, dimensional work that looks far beyond flat cutting. Just budget the time; detail takes hours, not minutes.
FAQ
Can any CNC router do 3D carving? Yes, any rigid machine can, given the right toolpaths and bits. The technique matters more than special hardware.
What bit do I use for 3D carving? A ball-nose bit for the finishing pass, since its rounded tip blends passes smoothly. Rough first with a larger end mill.
Why does my carve take so long? 3D carving builds a surface from many closely spaced passes. A tight stepover for smoothness multiplies run time, which is normal.
How do I get a smoother surface? Reduce the stepover on the finishing pass and use a ball-nose bit. Tighter spacing means less sanding.
What wood carves best? Tight, even-grained species like maple, cherry, walnut, and basswood hold fine detail. Soft, open-grained woods can fuzz.
Do I need two toolpaths? Yes, use a roughing pass to clear the bulk quickly, then a finishing pass for the smooth surface. It saves time and protects the fine bit.
How much sanding is needed? With a tight finishing stepover, only light sanding through finer grits following the contours.
References
- CNCRouterInfo, how to choose a CNC router: https://cncrouterinfo.com/guides/how-to-choose-a-cnc-router/
- BubbleRelief, CNC router projects for beginners: https://bubblerelief.com/cnc-router-projects-for-beginners/