
CNC Acrylic Router Guide: Tooling, Speeds, Workholding, and Finish Quality
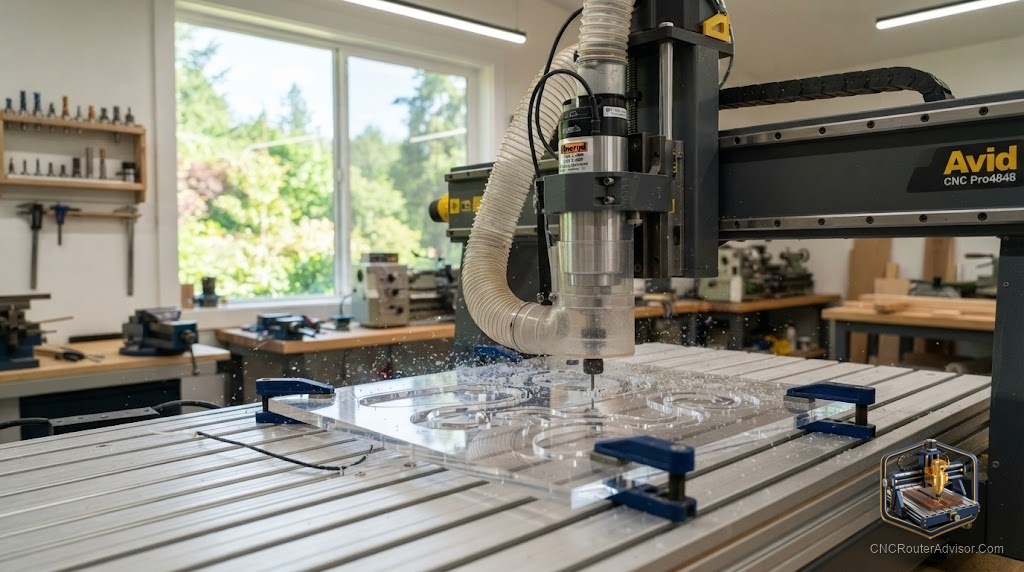
The first time you cut acrylic on a router, the machine usually tells on you within about ten seconds. You hear a change in pitch, then you smell it, and when the bit lifts you find a bead of re-melted plastic welded into the slot instead of a clean edge. Acrylic does not forgive the settings you use for wood. Get the heat wrong and the chips melt behind the cutter, stick to the flutes, and ruin both the part and the bit.
A CNC acrylic router is simply a CNC router set up to cut acrylic well, which means the right bit, the right spindle speed, real chip evacuation, and workholding that keeps thin sheet from lifting or chattering. The machine matters less than the recipe. A modest desktop router with a single flute bit and good hold-down will out-cut a heavier machine that is spinning too fast in the wrong tool.
Cast beats extruded, almost every time
Before you touch feeds and speeds, pick the right material. Cast acrylic machines far better than extruded. It is more dimensionally stable, resists stress cracking, and produces cleaner chips, which is why fabricators reach for it when edge quality matters. Extruded acrylic is cheaper to buy and easier to thermoform, but it softens sooner and gums up faster under a cutter. If your job allows a choice, choose cast, especially in the 6mm to 12mm thickness range where it behaves best.
Tooling: single flute is the answer
The enemy in acrylic is heat, and the fix is a bit that clears chips fast enough to carry the heat away before it melts anything. That points you to single flute or O-flute bits designed for plastic. The wide, polished flute of an O-flute grabs a big chip and throws it clear instead of recutting it.
- Single flute or O-flute upcut: the default for cutting through sheet. Upcut pulls chips up and out of the slot.
- O-flute downcut: leaves a cleaner top surface, useful for shallow engraving, but it packs chips down into the cut so it needs shallow passes.
- Two flute and up: avoid for through-cuts in acrylic unless you are running fast production feeds. More flutes at hobby feed rates means more rubbing and more melting.
Run a fresh, sharp bit. A dull tool rubs instead of cuts, and rubbing is just another word for heat.
Speeds, feeds, and the melting line
Acrylic wants a lower spindle speed than most people expect and a healthy feed rate to keep the chip load up. A common starting window is roughly 18,000 RPM with a feed rate in the 100 to 200 IPM range on a rigid machine, with a target chip load around 0.003 to 0.005 inch for a 1/8 inch bit and 0.008 to 0.010 inch for a 1/4 inch bit. On a light desktop machine you cannot push those feeds, so you drop the RPM further to keep the chip load sane. If your machine’s trim router will not go below about 12,000 RPM, expect to work harder at chip clearing.
Take shallow passes. A depth of cut around half the bit diameter per pass keeps the cutter from overloading and gives chips room to escape. If you see melting, the fix is almost always more feed or less RPM, not the reverse.
Workholding and chip evacuation
Thin acrylic sheet loves to lift, and the moment it lifts, the bit welds it. Hold it flat and hold it everywhere:
- Double sided tape on a flat spoilboard works well for thin sheet and small parts.
- Low tack painter’s tape plus CA glue is a shop favorite for a strong, removable bond.
- Perimeter clamps plus tape handle larger sheets, but keep clamps clear of the toolpath.
Then deal with the chips. An air blast aimed at the cutter is the single best upgrade for acrylic. It cools the tool and blows melted-prone chips clear. A vacuum dust shoe helps, but air directly at the tool is what stops the weld.
Finish quality and edge polishing
A good cut leaves a frosty but smooth edge. If you need optical clarity, plan a finishing pass that removes only a few thousandths so the last cut is clean, then polish. Buffing compound on a wheel, careful flame polishing, or wet sanding up through fine grits all bring the edge to clear. Leave the protective masking on the sheet through the whole cut to protect the faces from scratches and welded debris.
The honest verdict
Acrylic is one of the most rewarding materials a router can cut, and one of the least forgiving of lazy settings. Buy cast sheet, run a sharp single flute bit, drop your spindle speed, keep the feed up, blow air at the tool, and hold the sheet dead flat. Do those five things and you get glassy edges. Skip any one of them and you get a melted mess and a wrecked bit. The machine is rarely the problem. The recipe is.
Frequently asked questions
Why is my acrylic melting instead of cutting? Too much heat. Your spindle RPM is too high for your feed rate, so the chips are tiny and get recut and melted. Slow the spindle, raise the feed, use a single flute bit, and add an air blast.
Cast or extruded acrylic for CNC? Cast, in almost every case. It machines cleaner, resists cracking, and holds tolerance better. Extruded is fine for thermoforming and lower cost, but it melts sooner under a cutter.
What bit should I use for acrylic? A single flute or O-flute bit made for plastics. Upcut to clear chips from through-cuts, downcut for a clean top surface on shallow work.
What spindle speed is best for acrylic? Lower than for wood. Around 18,000 RPM is a common start, and lighter machines often go lower to keep the chip load correct.
How do I get a clear, polished edge? Cut a light finishing pass, then buff with plastic polishing compound, flame polish carefully, or wet sand through fine grits.
How deep can each pass be? Start around half the bit diameter per pass. Deeper passes overload the cutter and trap chips, which brings back melting.
Do I need coolant? Not liquid coolant. An air blast aimed at the tool is usually enough to keep acrylic cool and clear the chips.