
CNC Routed Signs Explained: Design, Setup, Bits, and Finishing
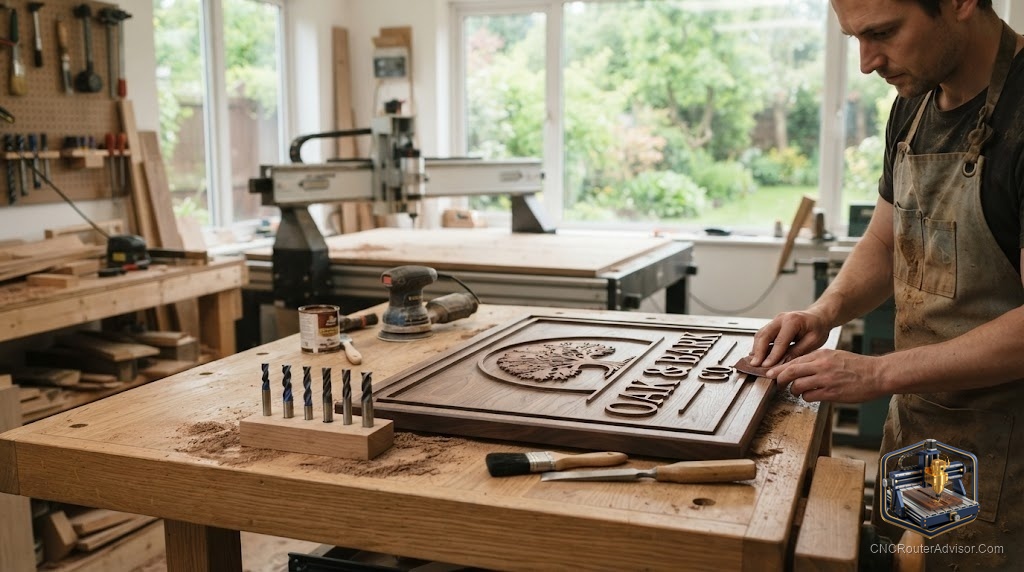
The first time someone sees a CNC routed sign, the reaction is usually the same. They pick it up, run a thumb across the lettering, and ask how. The combination of crisp depth, clean edges, and a design that looks impossible to replicate by hand stops people. And then you explain that the machine does all of that from a file, and the follow up question is always: how hard is it to learn?
Not as hard as it looks. This guide covers how CNC routed signs work, the design and file setup that makes them succeed, the bits and techniques that produce clean lettering and edges, and the finishing steps that turn a raw cut into a piece worth displaying.
What CNC routed signs are
A CNC routed sign is a piece made on a router, where the machine carves text, images, and design elements into or through a flat material. The machine follows a file rather than a hand, so the result is precise and repeatable. Common outputs include personalized name signs, address plaques, quote signs, house number plaques, engraved cutting boards, and decorative wall art with geometric or silhouette designs.
The materials are mostly wood: plywood, hardwood like oak, maple, walnut, and cedar, and MDF for painted signs. Some signs use plastics like HDPE or acrylic for outdoor durability. The design file is usually a vector file in SVG or DXF format, and the carving tools are V-bits for lettering and fine detail and straight bits for clearing background material.
The short answer
To make a clean CNC routed sign, you need a design with clean vectors, the right bit for your detail level, and a file setup that matches the machine’s capability to the design. A V-bit does the lettering, a straight or ball nose bit clears the background if you want a raised letter effect, workholding holds the blank flat and still, and finishing with paint or stain followed by a light sand across the face completes the piece. The machine handles precision. Your job is file setup, bit choice, and finishing.
Design and file setup
Start with a clean vector. Fonts and artwork in SVG or DXF format import cleanly into CAM software and give the machine precise paths to follow. Raster images, like JPEGs or PNGs, do not work directly because they describe pixels rather than paths. If you are starting from a photo or a hand drawing, convert it to a vector first using tracing software or design it from scratch in a vector tool.
In your CAM software, assign the V-carve operation to the text and detail, the pocket operation to any areas you want cleared to a flat depth, and the profile cut if you are cutting the sign to a shape rather than leaving it rectangular. Preview the toolpaths carefully before cutting, because mistakes show up clearly in wood.
Work area and blank size: cut your sign blank to size before routing, leave a margin for clamping, and check that the design fits within the cutting travel of your machine.
Bits for sign work
The V-bit is the sign cutter’s primary tool. Its angled profile cuts a V-groove that narrows as the machine goes shallower and widens as it goes deeper, which is exactly how lettering looks natural in wood. Common V-bit angles are 60 and 90 degrees: 60 degree bits are sharper and suit fine detail, 90 degree bits are more forgiving and suit larger bold text. Match the bit angle to your font size and detail level.
A straight bit clears flat pockets for backgrounds or raised letter designs, where the background is removed to a depth so the letters stand proud. A ball nose bit follows curved surfaces and works well for textured backgrounds.
Keep bits sharp. A dull V-bit tears wood fibers at the edge of the groove instead of slicing them, and the sign picks up a fuzzy, rough look that sanding can only partially fix.
Workholding for signs
A sign blank that moves mid cut can ruin the piece and is dangerous. For rectangular blanks on a wasteboard, low profile clamps outside the design area are reliable. For thin or oddly shaped blanks, painter’s tape plus cyanoacrylate glue on the wasteboard gives strong adhesion without leaving clamps in the path. Tabs on through cut profiles hold cut-out shapes in place until you remove them manually after the cut.
Finishing the sign
Raw routed wood takes paint or stain beautifully, and the finishing step is where a sign comes to life. The classic method for painted letter signs is to paint the recessed carved areas with a contrasting color, let it dry, and then lightly sand the face of the sign to remove paint from the surface while leaving color in the grooves. This pop paint finish is fast, forgiving, and dramatic. Stains and oils work better on natural wood signs where you want to show grain. Clear topcoat with a UV resistant finish protects outdoor signs.
Light sanding with fine sandpaper before finishing smooths any fuzz left by the cut, especially in softwoods and MDF edges.
Who should skip sign making for now
Skip starting with signs if your machine is not well squared and your workholding is not sorted, because both show up harshly in lettering quality. Signs punish a misaligned machine and a shifting blank more visibly than most other projects. Get the basics clean first, do a few practice cuts on scrap, and then move to a real sign blank.
Comparison: sign types by technique
| Sign type | Primary bit | Finish approach | Material |
| V-carved text on flat background | V-bit 60 or 90 degree | Paint fill and sand | Hardwood, MDF |
| Raised letter (background cleared) | V-bit plus straight bit | Stain or paint face | Hardwood, plywood |
| House number plaque | V-bit | Weather resistant clear | Hardwood, HDPE |
| Engraved cutting board | V-bit | Food safe oil only | Maple, walnut |
| Wall art silhouette | Straight bit profile cut | Stain or paint | Plywood, hardwood |
The verdict
CNC routed signs are one of the best first projects because the results are immediately impressive and the techniques are clearly teachable. A clean vector file, a sharp V-bit, firm workholding, and a good finishing process are the four things that separate a crisp, professional looking sign from a rough one. The machine handles the carving. You handle the design, the setup, and the finish. Nail those and you will have pieces people want to buy, display, and give as gifts, and you will understand your machine far better than a dry test cut would ever teach you.
Frequently asked questions
What wood is best for CNC routed signs? Hardwoods like maple, walnut, oak, and cherry take a V-bit cleanly and finish beautifully. Pine and cedar are softer and carve well but fuzz more at the edges. MDF is ideal for painted signs because it takes paint uniformly.
What bit do I need for sign lettering? A V-bit, either 60 or 90 degree depending on your font size and detail level. Sharp carbide V-bits slice wood fibers cleanly and produce crisp edges. A dull bit tears and fuzzes, so replace it when the cut quality drops.
Do I need a vector file to carve a sign? Yes. Your CAM software needs vector paths to generate toolpaths. Fonts and designs in SVG or DXF format work directly. Raster images like JPEGs need tracing to convert them to vectors first.
How do I get the painted color only in the carved area? Apply contrasting paint to the whole routed face, let it dry completely, then sand lightly across the surface. The sanding removes paint from the high points while leaving it in the carved grooves. This is the classic V-carve paint fill technique.
What file format does a sign design need to be in? SVG or DXF are the most widely used vector formats for CAM software. Export from design software in either format and import into your CAM program to generate the carving toolpaths.
Can I route signs in plastic? Yes. HDPE and acrylic route cleanly and are excellent for outdoor signs where wood durability is a concern. Use appropriate feeds and speeds for plastic to avoid melting rather than cutting.
References
- Bubble Relief, CNC Router Projects for Beginners: https://bubblerelief.com/cnc-router-projects-for-beginners/
- Instructables, DIY CNC Router Plans: https://www.instructables.com/DIY-CNC-Router-Plans-How-to-Build/