
CNC Wood Routing Guide: Tooling, Speeds, Workholding, and Finish Quality
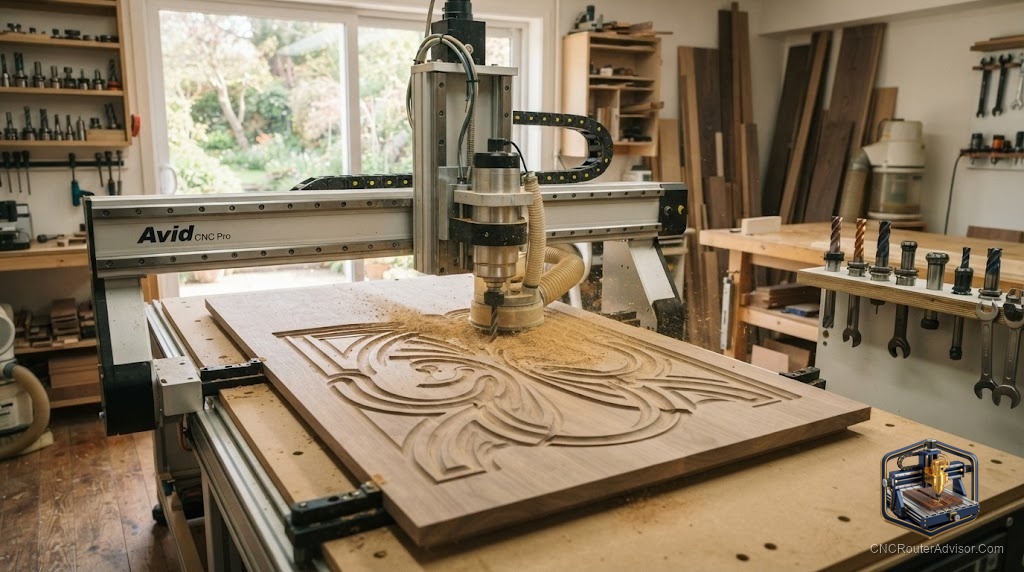
The sign came out with fuzzy edges on the oak letters and char marks along the walnut border. The bit was brand new. The file was clean. The problem was the settings — 24,000 RPM with a 1/4” two-flute bit moving at 60 inches per minute in hardwood. The chip load was so low the bit was rubbing, not cutting. CNC wood routing done right starts with understanding what happens at the cutting edge, and then matching every variable to the material in front of you.
CNC wood routing is the process of using a computer-controlled router or spindle to remove material from wood stock by moving a rotating bit along programmed toolpaths. The result depends on four things working together: the right bit geometry, correct feeds and speeds, solid workholding, and a clean finishing strategy for the final pass.
The single most important concept in CNC wood routing is chip load. Get chip load right and your bits last longer, your surfaces come out cleaner, and your machine runs quieter. Every other decision flows from it.
What Is Chip Load and How Do You Calculate It?
Chip load is the thickness of material each cutting flute removes per revolution, measured in inches or millimeters. The formula is:
Feed Rate = RPM x Flutes x Chip Load
So if you’re running 18,000 RPM with a 2-flute bit targeting 0.010” chip load: 18,000 x 2 x 0.010 = 360 inches per minute
That’s your feed rate. Most beginners run feeds far too slow and RPMs far too high, which produces a chip load below 0.003”. The bit rubs instead of shearing, generates friction heat, burns the wood, and dulls within a few cuts.
Target ranges for a 1/4” bit:
- Hardwood (oak, maple, walnut): 0.009” to 0.011” per tooth
- Softwood and plywood (pine, cedar, birch ply): 0.011” to 0.013” per tooth
- MDF and particleboard: 0.013” to 0.016” per tooth
Choosing the Right Bit for Each Wood Type
The geometry of your bit determines chip evacuation, surface quality, and how the grain responds to cutting.
Upcut spiral pulls chips up and out of the cut. This keeps the flutes clear and prevents re-cutting chips, which causes heat and surface damage. The trade-off: the upward pull can cause tearout on the top face of the workpiece. Use upcut spirals when chip evacuation is the priority — deep pockets, thick softwood, MDF.
Downcut spiral pushes chips down into the cut. This produces a clean, crisp top surface with no tearout, which is what you want on hardwood sign faces, cabinet door faces, and anything you’re looking at from above. The downside: chips pack into the pocket and generate heat faster. Use downcut for shallow passes and finish cuts.
Compression spiral combines an upcut tip with a downcut top section. The result is clean faces on both the top and bottom of sheet goods — ideal for plywood, laminated panels, and melamine-coated MDF. This is the standard bit for cabinet shops cutting sheet goods.
Single-flute O-flute (for plastics): When you’re routing acrylic, HDPE, or Delrin alongside wood projects, switch to a single-flute O-flute designed for plastics. Its larger flute gullet evacuates chips before they remelt to the cut edge.
V-bits: For engraving and V-carving in any wood, a 60-degree or 90-degree V-bit produces sharp lines. Pine and poplar are forgiving with V-bits. Dense hardwoods like maple require a sharp bit and slower feeds to prevent fuzzing in the apex of the V.
Feeds and Speeds by Material: A Practical Reference
Pine and cedar (softwood): 1/4” two-flute upcut, 18,000 RPM, 200 to 300 IPM, depth of cut 0.25” per pass. Softwood cuts fast and forgiving. If you see fuzz, your bit is dull.
Poplar: Similar to pine. Poplar is consistent and machines cleanly. A good material for learning feeds and speeds because it’s cheap and predictable.
Oak, maple, walnut (hardwood): 1/4” two-flute, 16,000 to 18,000 RPM, 150 to 200 IPM, depth of cut 0.125” to 0.150” per pass. These are the three main domestic hardwoods in cabinet and furniture work. Maple is the hardest of the three and the most unforgiving of a dull bit. Walnut machines beautifully and telegraphs bit sharpness clearly — sharp bits leave a nearly finished surface.
MDF: 1/4” single-flute compression spiral, 18,000 RPM, 200 to 300 IPM, 0.25” depth of cut. MDF is dusty and abrasive. It eats cheap bits. Buy quality carbide, run correct chip loads to generate actual chips rather than dust, and connect dust collection before you start.
Baltic birch plywood: 1/4” compression spiral, 18,000 RPM, 180 to 250 IPM, 0.25” depth per pass. The alternating grain layers can cause tearout with upcut bits. A compression spiral gives clean top and bottom faces through the laminations.
Acrylic: Single-flute O-flute, 16,000 to 18,000 RPM, 100 to 150 IPM, 0.1” depth per pass. Acrylic cracks under lateral force. Never plunge straight down — use a ramped or helical entry. Air blast or chip vacuum prevents re-melting.
HDPE: Single-flute O-flute, 18,000 RPM, 150 to 200 IPM. HDPE is soft and gummy. The large flute gullet is critical. Without it, chips weld back to the part.
Workholding: The Part That Ruins Cuts When It Fails
A workpiece that moves mid-cut ruins the part and can destroy the bit. Here are the methods that actually hold.
Spoilboard and screws: The most reliable method for production work. Screw your workpiece directly to an MDF spoilboard through the waste areas of the part, or through tabs you’ll cut away. No movement, no mystery. The limitation: screw locations must be planned into your CAM file, and you surface and replace the spoilboard as it accumulates cuts.
Double-sided tape: Fast setup for thin stock and small parts. The limitation is holding force under lateral cutting pressure. In hardwood at aggressive feeds, tape can let go. Use it for light finish passes, thin sheet goods, and engraving rather than heavy profile cutting.
Vacuum table: The professional solution for sheet goods. A vacuum pump pulls air through a porous spoilboard or a zone-based grid, clamping the workpiece to the table with distributed holding force. No screws, no setup per-part, and fast material loading. The cost — vacuum pump, plumbing, porous or drilled spoilboard — puts it in the mid-to-upper machine tier.
Clamps and toe clamps: For large solid wood panels, L-brackets and toe clamps along the perimeter are reliable. Keep clamps clear of the toolpath by at least 1” and check your simulation before cutting.
Tabs: Leave small uncut tabs connecting parts to the surrounding material until the profile cut is complete. Tabs prevent parts from lifting and shifting on the final pass. You break or cut them away after. Essential for parts cut all the way through, especially smaller pieces.
Getting a Clean Finish
The difference between a CNC-cut surface that goes straight to finish and one that needs heavy sanding often comes down to two things: roughing vs. finishing passes, and feed direction relative to grain.
Roughing and finishing passes: Run your main toolpath with full depth of cut to remove material quickly, then run a second finishing pass with a 0.010” to 0.020” radial offset at a higher feed rate. This final pass removes the witness marks from the roughing cuts and leaves a cleaner surface because the bit is taking a thin, consistent chip with no prior cut forcing it to deflect.
Climb vs. conventional milling: In conventional milling, the bit engages wood against its rotation direction. In climb milling, the bit moves with its rotation direction, which reduces cutting forces and often leaves a cleaner edge — but can grab and pull the workpiece if your holding isn’t solid. Use conventional milling while learning. Add climb milling passes once your workholding is dialed in.
Grain direction: Routing across the grain of hardwood produces cleaner edges than routing with the grain, where the bit tends to follow fibers and cause tearout. Plan your toolpath orientation to cut across grain on profiled edges where surface quality matters.
Sanding strategy post-CNC: On hardwood profile cuts, a quick pass with 120-grit followed by 180-grit removes any remaining machining marks and raises the grain for finish. On MDF, avoid sanding the face — you’ll break through the hard skin. Seal with shellac or sanding sealer first if you need to sand MDF faces.
Dust Collection: Functional, Not Optional
MDF routing produces particles that are a known respiratory hazard. The EPA and OSHA both document hardwood and MDF dust health risks. A shop vacuum connected to a dust shoe is the baseline. For MDF-heavy work, a proper dust collector (1.5 to 2 HP) with a cyclone separator and bag filter catches fine particles before they recirculate into your shop air.
On soft woods and plywood, chips are coarser and easier to clear. On MDF and particleboard, the dust is so fine it stays suspended for hours. Treat MDF dust the same way you’d treat metal grinding dust: contain it at the source.
Conclusion
Successful CNC wood routing comes down to matching your process to your material. Four things that matter most:
- Calculate chip load before you cut, not after you burn a bit.
- Match bit geometry to both the material and the surface quality you need.
- Hold the workpiece so it physically cannot move — every method that “probably” holds will eventually fail.
- Run a finish pass to separate the work of material removal from the work of surface quality.
FAQ
What RPM should I run for CNC wood routing? Most CNC router spindles and trim routers run 16,000 to 24,000 RPM for wood. The key is matching RPM to feed rate so your chip load stays in the 0.009” to 0.016” range depending on material and bit diameter. Running high RPM at low feeds produces burn and bit wear. Running low RPM at high feeds risks bit deflection or breakage.
Why is my CNC router burning the wood? Burning is almost always a chip load problem. Either your feed rate is too slow for your RPM (under-loading the bit), your bit is dull, or your depth of cut is too shallow and the bit is rubbing. Increase your feed rate, check bit sharpness, and confirm your chip load calculation.
What is the best bit for cutting plywood on a CNC? A compression spiral bit is the standard choice for plywood. Its upcut tip clears chips and its downcut upper section keeps both faces clean through the veneer layers. For thin plywood under 0.5”, a downcut spiral gives clean top faces with fewer tear-out concerns.
How do I prevent parts from moving during cutting? Use screws through waste areas into a spoilboard for production work. For smaller parts, combine double-sided tape with tabs in your toolpath. Vacuum tables are the most efficient for high-volume sheet cutting but require investment. Whatever method you use, test with a dry run (Z raised, no cutting) before committing.
Can I route green or wet wood on a CNC? Technically yes, but results are poor. Wet wood gums up flutes, causes fuzzy cut surfaces, and the moisture introduces dimensional instability as the part dries after cutting. Use properly dried lumber at 6% to 8% moisture content for predictable results.
What is a spoilboard and when do I resurface it? A spoilboard is a sacrificial flat surface clamped to the CNC table that your bit can cut into without damaging the machine. Resurface it (skim cut with a surfacing bit) when it accumulates enough cuts that it’s no longer flat, or when you switch between vacuum zones. Keeping it flat ensures your workpiece sits level across the full area.
How deep should I cut per pass in hardwood? For a 1/4” bit in hardwood, 0.125” (1/8”) depth per pass is a safe starting point. That’s 50% of the tool diameter. You can push to 0.200” per pass with a rigid machine and sharp tooling, but start conservative and work up. Soft woods like pine and poplar can handle full-diameter depth of cut (0.25” for a 1/4” bit) at moderate feeds.