
CNC Wood Router Kit Guide: Tooling, Speeds, Workholding, and Finish Quality
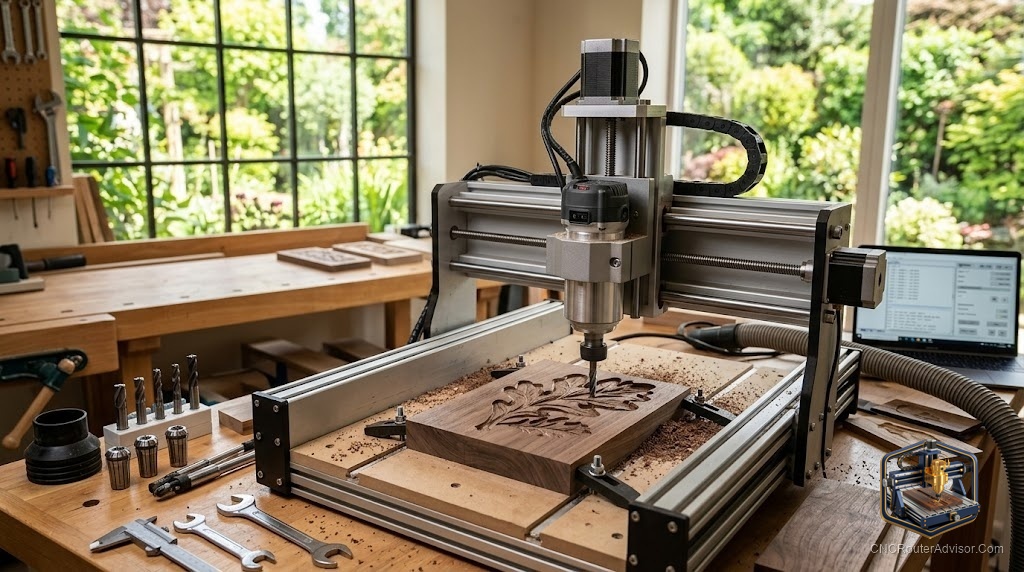
The kit showed up in one box, and by evening it was cutting. That is the appeal of a CNC wood router kit, and it is real. You get a machine designed as a complete package, assemble it in an afternoon, and start making sawdust the same day. But a kit is only as good as how you run it, and the gap between a rough, fuzzy cut and a clean, crisp one comes down to four things: the right tooling, sensible speeds, solid workholding, and understanding how those combine into finish quality.
This guide is the practical side of owning a wood router kit. Not which brand to buy in the abstract, but how to get results you are proud of once the machine is on your bench.
What a CNC wood router kit includes
A kit is a complete machine sold as a package: the frame, the gantry, the motion system, a spindle or a mount for a trim router, the controller, and the software or firmware to run it. Most hobby kits use GRBL based control, which is well supported and beginner friendly. You assemble it, square it up, and you have a working machine designed to cut plywood, MDF, hardwoods like oak, maple, and walnut, softwoods like pine, cedar, and poplar, and soft plastics such as acrylic, HDPE, and Delrin.
The advantage over a scratch build is that the parts are matched and the geometry is worked out. You spend your time cutting, not engineering a machine from raw components.
The short answer
To get clean results from a wood router kit, match four things. Use sharp, appropriate bits, meaning a single flute or two flute upcut for clearing and a downcut or compression bit when top surface finish matters. Set feeds and speeds so the cutter takes a real chip instead of rubbing, which burns wood and dulls tools. Hold the work down hard with clamps, tape and glue, or a vacuum setup so nothing shifts. And control chips with dust collection so they do not recut. Get those right and even a modest kit produces crisp, professional looking parts.
Tooling: the bits that make or break the cut
Bits matter more than beginners expect. For clearing pockets and general cutting in wood, an upcut spiral pulls chips up and out, keeping the cut cool and clean at the bottom. When the top surface must stay crisp, a downcut bit presses the top fibers down and prevents fuzzing, though it packs chips downward. A compression bit combines both and is the go to for plywood edges because it leaves both faces clean.
Keep bits sharp. A dull bit rubs instead of cutting, which burns the wood, loads up the flutes, and leaves a fuzzy edge. Single flute bits clear chips well at the higher RPM of a trim router, which is why they are popular on hobby kits.
Speeds: feeds and RPM that cut instead of rub
The goal is a real chip, not dust. If the spindle spins fast and the machine moves slowly, the bit rubs, generates heat, and burns the wood. If it moves too fast for the bit and machine, you get chatter or a broken tool. The fix is chip load: the amount of material each flute removes per pass. Start with the bit maker’s recommended chip load, keep the RPM moderate on a trim router, and increase feed rate until the cut sounds strong and produces chips rather than powder. Burn marks mean slow down the RPM or speed up the feed.
Workholding: nothing moves, nothing tears
A kit machine is lighter than an industrial one, so workholding does double duty: it keeps the part still and it keeps the cut clean. Low profile clamps on a wasteboard handle thick stock. For thin sheets, painter’s tape on the board plus tape on the part with cyanoacrylate glue between them creates a strong, quick bond. A vacuum setup is the upgrade for lots of flat panel work. Whatever you use, confirm the part cannot lift near the end of a cut, when the last tabs release.
Finish quality: how it all comes together
Finish is the sum of the other three. Sharp appropriate bits give clean edges. Correct feeds and speeds prevent burning and fuzz. Firm workholding stops chatter and tearout. Add good chip evacuation so the cutter is not recutting debris, and take a light finishing pass on the final contour to clean the wall. A leveled, flat wasteboard matters too, because an out of flat bed shows up as uneven depth across a wide part.
Who should skip a kit
Skip a kit if you want zero assembly and setup. A fully pre built machine gets you cutting with less fiddling, though kits are not far behind. Skip the smallest kits if you already know you need a large work area, since outgrowing a tiny machine quickly is a common regret. And skip bargain kits with vague specs and no support community, because a well supported platform saves you hours when you hit a snag.
Comparison: bit choices for wood kits
| Bit type | Best for | Strength | Watch out for |
| Upcut spiral | Pockets, general clearing | Great chip evacuation | Can fuzz the top edge |
| Downcut spiral | Clean top surface | Crisp top edge | Packs chips into the cut |
| Compression | Plywood, both faces clean | Clean top and bottom | Needs adequate cut depth |
| Single flute | Higher RPM trim routers | Good chip clearing | Match feed to avoid rubbing |
For a complete kit that assembles quickly and runs GRBL, the FoxAlien XE-PRO with a ballscrew motion system is a solid starting machine, available at this listing. The larger VEVOR Evolution 4 kit offers a bigger work area for panel work at this listing. For a compact, well supported option, the Genmitsu 4040 PRO is available at this listing.
The verdict
A CNC wood router kit is one of the fastest ways into the hobby because the hard engineering is done for you. But the machine does not make good parts on its own. Clean results come from sharp, appropriate bits, feeds and speeds that produce a real chip, workholding that never lets the part move, and dust control that keeps the cut clear. Nail those four and a modest kit will surprise you with its finish. Ignore them and even a capable kit leaves you sanding out burns and tearout. Buy a well supported kit sized a little bigger than today’s project, and spend your first week learning to cut clean.
Frequently asked questions
Are CNC wood router kits hard to assemble? Most hobby kits assemble in an afternoon with basic tools. The parts are matched and the instructions are written for beginners. Squaring the machine carefully during assembly pays off in cut quality later.
What bit should I start with for wood? A quarter inch or eighth inch upcut spiral covers most general cutting and pocketing. Add a downcut or compression bit when you need a clean top surface, especially on plywood.
Why is my kit leaving burn marks? Burning means the bit is rubbing instead of cutting. Lower the spindle RPM, increase the feed rate, and make sure the bit is sharp. The goal is chips, not powder.
How do I hold thin wood down on a kit machine? Use painter’s tape on both the wasteboard and the part with cyanoacrylate glue between them, or a vacuum setup for lots of flat work. Confirm the part cannot lift as the final pass releases it.
Do kits come with software? Most run GRBL firmware and pair with free or low cost control and CAM software. That combination is well supported, so help is easy to find when you get stuck.
Can a wood router kit cut plastic and aluminum? Yes for soft plastics like acrylic, HDPE, and Delrin with the right bit and speeds. Soft aluminum is possible on rigid kits with careful technique, but wood and plastic are where kits are happiest.
References
- CNC Router Info, How to Choose a CNC Router: https://cncrouterinfo.com/guides/how-to-choose-a-cnc-router/
- Bubble Relief, CNC Router Projects for Beginners: https://bubblerelief.com/cnc-router-projects-for-beginners/
- Instructables, DIY CNC Router: https://www.instructables.com/DIY-CNC-Router/