
CNC Router for Cutting Aluminum: Techniques, Settings, and Workflow
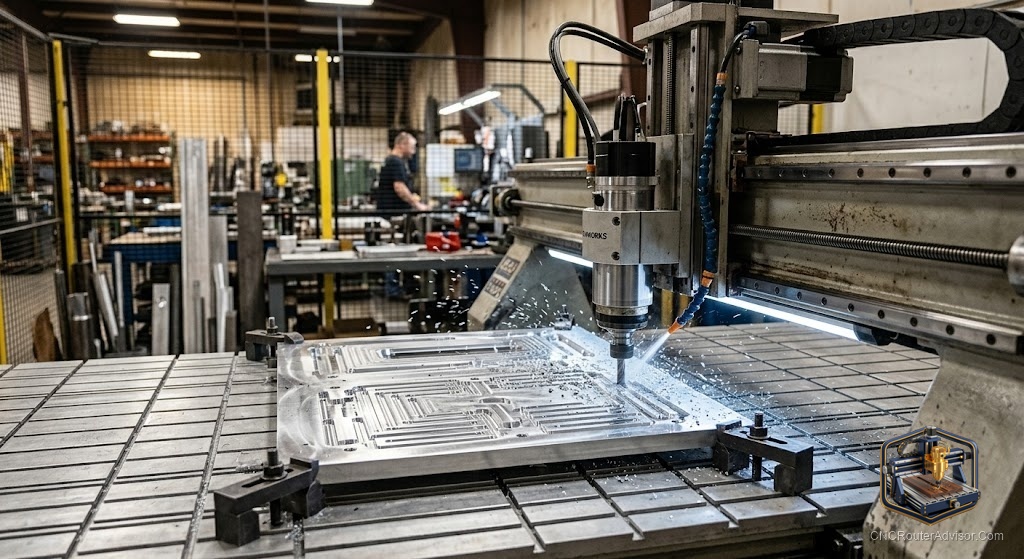
The gap between a CNC router that technically can cut aluminum and one that reliably does is almost entirely about the operator, not the machine. The machine hardware sets the ceiling on what is possible, but the decisions you make on tooling, speeds, and workholding determine whether any given job comes out clean or ends with a snapped bit and a scrap piece. This guide focuses on the technique and workflow side: how to set up a cut in aluminum that works, what to adjust when something goes wrong, and how to build the repeatable process that makes aluminum part of your regular work.
Cutting aluminum on a CNC router means using a computer-controlled gantry machine to profile, pocket, slot, or drill aluminum stock with a rotating carbide tool. The workflow covers tool selection, fixturing, programming feeds and speeds in CAM, running the first pass, and iterating until the cut is clean and reliable.
Short answer for getting started: fix the material so it cannot move, load a single-flute carbide end mill, set a conservative depth of cut with a real feed rate, point air at the cut, and run a test pass. Adjust one thing at a time until the cut sounds steady and throws bright small chips. Then save those settings.
Step 1: Fix the material so it will not move
Start with workholding because nothing else matters if the part shifts. Aluminum sheet is light, smooth, and slippery under clamps. Use mechanical clamps at multiple points, double-sided tape backed up with edge clamps for thin sheet, and tabs in the toolpath to keep cut-out parts from shifting on the final pass. Spend more time on workholding than feels necessary and fewer bits will break.
Step 2: Load the right tool
Single-flute solid carbide end mills (O-flute) designed for non-ferrous metals for roughing. Two-flute non-ferrous carbide for a finishing pass. Confirm the shank matches your collet, seat it properly, and tighten firmly. A bit rattling in a loose collet introduces runout that wrecks finish and snaps tooling.
Step 3: Set feeds, speeds, and depth in CAM
Lower spindle RPM than for wood. Real feed rate, not slow. Shallow depth of cut, especially on the first run. A starting point for light machines: 10,000 to 18,000 RPM, depth of cut 0.2 to 0.5mm, and a feed rate the machine executes smoothly. Run a test, listen, and adjust upward incrementally.
Step 4: Air at the cut, constantly
Chips that linger get recut, heat up, and weld to the tool. Point a compressed air nozzle or cold air gun at the cut zone to clear chips continuously. This single addition improves finish, extends tool life, and prevents the gumming that snaps bits.
Step 5: Listen, watch, and iterate
A clean aluminum cut sounds steady and rhythmic and throws small, bright chips. High-pitched scream with fine powder means rubbing: slow the spindle or increase the feed. Chatter or waviness means flex in the setup: check workholding and take a shallower pass. Adjust one variable at a time and note what worked.
The verdict
Cutting aluminum on a CNC router is a learnable, repeatable process. Fix the workholding first, use single-flute carbide, run lower RPM with a real feed rate, blow air at the cut, and adjust one thing at a time until the cut is clean. Save the parameters that worked. The second aluminum job is dramatically easier than the first.
Three things to remember:
- Workholding failure causes more broken bits in aluminum than any other factor; clamp harder than you think necessary.
- Single-flute carbide for roughing, two-flute for finishing; multi-flute wood bits gum and fail.
- Adjust one variable at a time and save the settings that produce clean, chip-clearing cuts.
FAQ
Where do I start when setting up to cut aluminum? Workholding first, then load single-flute carbide, then program conservative feeds and speeds, add air clearing, and run a test pass.
What does a good aluminum cut look and sound like? Steady, rhythmic sound, small bright chips clearing from the cut zone.
What RPM for cutting aluminum? Lower than for wood. A common starting range for hobby machines is 10,000 to 18,000 RPM depending on tool diameter.
Why does my aluminum cut look melted? The bit is rubbing rather than cutting. Lower the RPM, increase the feed, and ensure chips are clearing.
How do I hold aluminum sheet on the table? Mechanical clamps at multiple points, double-sided tape for thin material backed up with edge clamps. Add tabs in the toolpath for cut-out parts.
Can I reuse aluminum cutting settings job to job? Yes, once dialed in for your machine, tool diameter, and material thickness, they transfer directly. Write them down.
When should I use a finishing pass? When the roughing pass leaves visible tooling marks. Switch to a two-flute non-ferrous carbide end mill at light depth.
References
- CNC Cookbook, Feeds and Speeds for Aluminum Milling: https://www.cnccookbook.com/cnc-router-aluminum-cutting/
- DATRON, Machining Aluminum: Tips for CNC Routing: https://shop.datron.com/pages/machining-aluminum
- Amana Tool, Aluminum Spiral O-Flute Router Bits: https://www.amanatool.com/products/cnc-router-bits/aluminum-non-ferrous-metal-cutting-router-bits/solid-carbide-aluminum-spiral-o-flute-cnc-router-bits.html